Most sewists put a lot of thought into their project and supplies, but often overlook one of the most important parts of successful sewing — the sewing machine needle. Choosing the correct sewing machine needle can completely change the outcome of your project.
Sewing with the wrong needle (or even a damaged needle) is one of the leading causes of sewing machine headaches. The wrong needle can cause thread breakage, skipped stitches, runs in your fabric, puckering, uneven seams, and even broken needles.
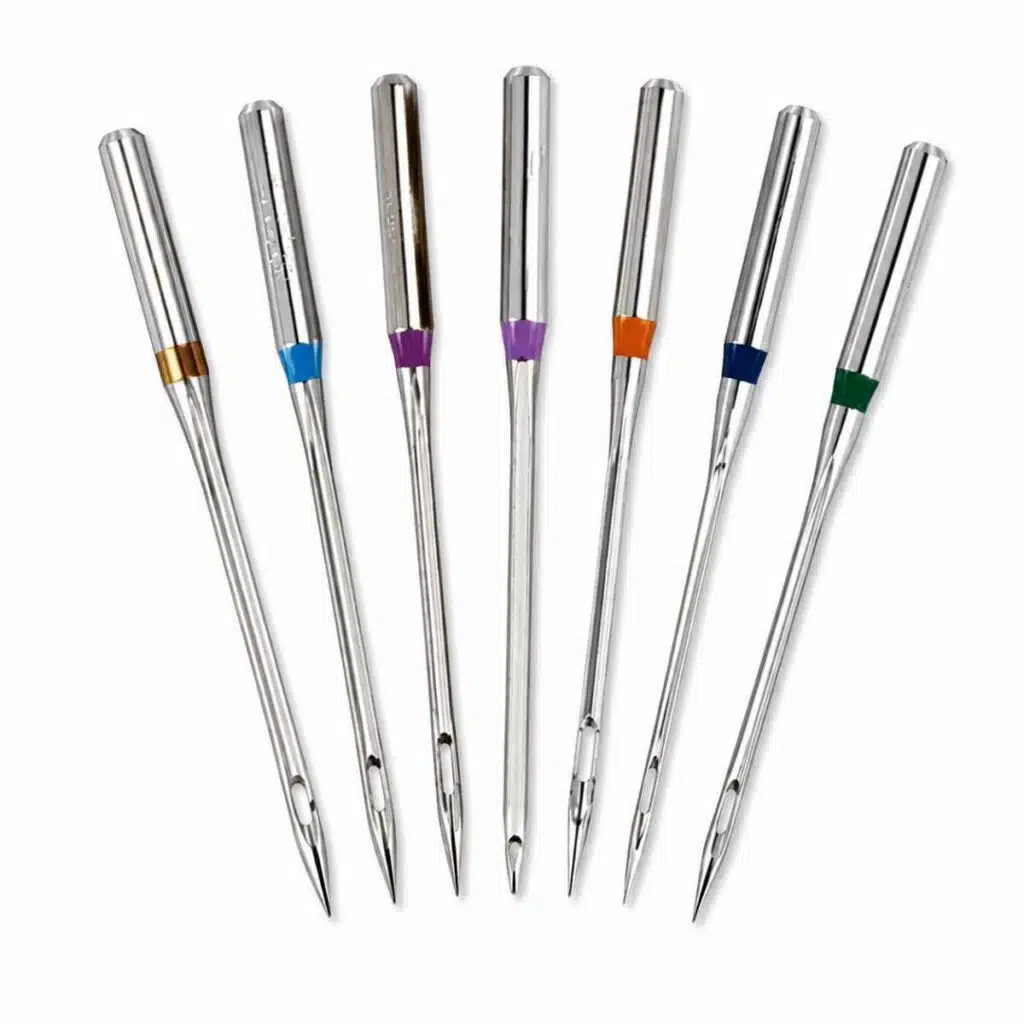
I know that when you are standing in front of the wall of sewing machine needles at the store, it can feel overwhelming. After a few minutes, they all start looking the same. I included the diagram above to help you see the parts of a needle because understanding a few basic parts can make choosing the correct one much easier.
When comparing needles, the biggest differences are usually at the tip, point, eye, and blade. Let’s go over them real quick.
Parts of a Sewing Machine Needle
Shank – That’s the part that fits into your sewing machine. You’ll notice that one side is flat. On most home sewing machines, the flat side faces the back of the machine. Always double-check your machine manual if you are unsure.
Blade – The blade plays a big role because it determines the needle size. The size is based on the needle’s diameter. Larger blades create larger needle sizes.
Shaft – The shaft is the main body of the needle and includes the groove, blade, and shoulder area.
Point – The point and tip vary in size, shape, and length depending on what fabric the needle was designed for.
Butt – The butt is the portion that slides up into the machine. When inserting a new needle, make sure it is pushed all the way up before tightening the screw. A needle that is not fully inserted can cause skipped stitches and other sewing problems.
Needle Types
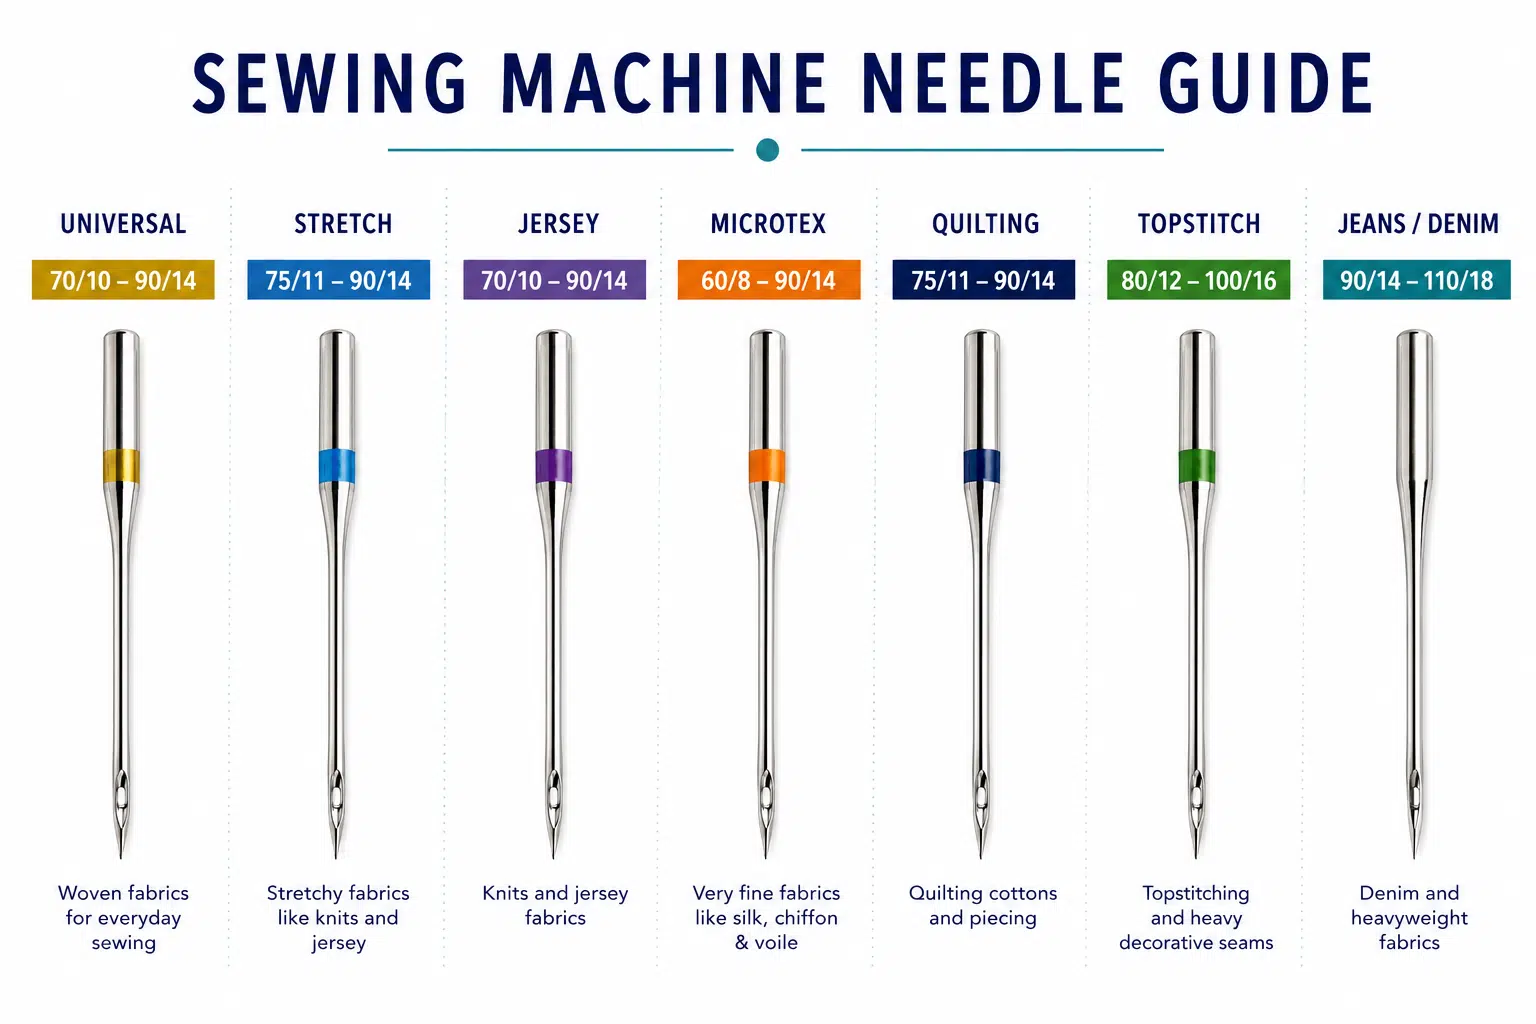
Needle types vary depending on the fabric and its weight. Here are the basic sewing machine needles to keep in your sewing box.
Universal Needles
Universal needles work well for cotton and many woven fabrics. They have a slightly rounded tip, which makes them a good all-around choice.
Denim Needles
Denim needles are used for exactly what the name suggests: denim, canvas, heavy twill, and other thick fabrics. These needles have a stronger shaft and a very sharp point designed to penetrate thicker materials.
Ball Point Needles
Ballpoint needles are perfect for knit fabrics, interlocks, jersey, and spandex. They have a rounded tip that slips between fibers instead of piercing them. This helps prevent snags, runs, and damage to the stretch in knit fabrics.
Leather Needles
Leather needles have a wedge-shaped point that penetrates leather, suede, vinyl, heavy faux leather, and other nonwoven materials.
When using a leather needle, stitch carefully because the needle creates a permanent hole. I recommend tying the thread ends instead of backstitching when possible, as repeated stitching can weaken the material. Since leather needles actually cut into fabric, they should never be used on woven or knit fabrics.
Sewing Machine Needle Sizes
Sewing machine needles are available in two sizing systems: American and European.
American sizes typically range from 8–19, while European sizes range from 60–120. Many brands list both numbers on the package, which is why you may see sizes like 80/12 or 90/14.
| Needle Type | Use | Common Fabrics | Suggested Sizes |
|---|---|---|---|
| Universal | Everyday sewing | Cotton, polyester, quilting cotton, blends | 70/10–90/14 |
| Ball Point | Stretch fabrics | Jersey, knits, interlock, spandex | 70/10–90/14 |
| Stretch | Highly elastic fabrics | Swim fabric, performance fabric, Lycra | 75/11–90/14 |
| Denim/Jeans | Heavy fabrics | Denim, canvas, duck cloth, twill | 90/14–110/18 |
| Quilting | Multiple fabric layers | Quilts, batting, piecing projects | 75/11–90/14 |
| Microtex | Fine and tightly woven fabrics | Silk, microfiber, chiffon, lightweight cotton | 60/8–90/14 |
| Topstitch | Heavy thread and decorative stitching | Topstitching, decorative seams | 80/12–100/16 |
| Leather | Nonwoven materials | Leather, suede, vinyl, faux leather | 90/14–110/18 |
| Embroidery | Decorative stitching | Machine embroidery fabrics | 75/11–90/14 |
An easy way to remember needle sizing is this: The thicker the fabric, the bigger the number.
General guide:
- 100/16–110/18: Heavy fabrics like denim, canvas, and upholstery fabric
- 60/8–70/10: Lightweight fabrics like silk, chiffon, and lightweight cotton
- 80/12–90/14: Medium-weight fabrics like quilting cotton and flannel
How Often Should I Change My Sewing Machine Needle?
Needles should be changed often!
I usually change mine after about 6 hours of sewing. If I sew anything coarse, glittery, burlap, or any fabric that I think will create extra wear on the needle, I replace it at the end of the project, even if I haven’t hit that six-hour mark.
Needles are inexpensive. They’re simply too cheap to let them ruin your project.
Signs your sewing machine needle may need replacing:
- Bent needles
- Skipped stitches
- Thread breaking repeatedly
- Puckered fabric
- Popping sounds while sewing
- Snagging fabric
How Do I Change My Sewing Machine Needle?
If you’re more of a visual learner, I have a video below showing exactly how to change a sewing machine needle.
If you prefer written instructions, here are the steps:
- Turn off your sewing machine.
- Raise the needle to its highest position using the handwheel.
- Raise the presser foot.
- Hold the old needle while loosening the needle clamp screw.
- Carefully remove the old needle.
- Insert the new needle with the flat side facing the correct direction for your machine.
- Push the needle all the way up into the machine.
- Tighten the screw securely.
- Rethread the machine and test stitches on scrap fabric before starting your project.
That last step saves a lot of frustration later.
The right sewing machine needle may seem like a small detail, but it can make a huge difference in how smoothly your project comes together. Taking a few extra seconds to choose the correct needle size and type and to replace it regularly can help prevent many common sewing frustrations before they start. A fresh needle is one of the easiest and least expensive ways to improve your stitches and make sewing more enjoyable.
Do you have a question about sewing machine needles that I missed? Let me know in the comments below.


thanks for this- I forget that I need to switch mine out!
Elle
Glad to help, it’s an easy thing to forget.
I have a needle whose blade is not round, but a tad angled. What is that used for?
Do you have a picture of it?
I’m totally guilty of not thinking about my needle!! Opps!
I didn’t even think of changing the needle after a few hours of sewing! Do you discard the removed needle? I’ve been sewing a lot of polarfleece and haven’t changed the needle for at least a year!
Yes, discard the used needle if it’s been used for more than about 8 hours of sewing or sooner if you can tell that it’s damaged.
So I should also change the needles of my overlocker as well?
Yes, you should.
I have a small Singer machine that I bought several years ago just for a “second” machine. However I have never been able to use it because it appears that the needle “timing” — as it goes down into the machine doesn’t pick up the bobbin thread. I don’t know the terminology to use to explain what I mean but as the needle goes down and the part that turns in a circle that catches the thread (enabling it to pick up the bobbin thread) never grabs the thread. Could it be that my needle isn’t long enough??? PLEASE HELP!!!😜
Have you tried changing out the needle with a new one? If so the timing could be off.
What needle type should I use to take
In a pair of sweat pants?
A needle for knit or stretch fabric.
Great post. It can be very hard to determine which needle to use. If you use an Universal needle for everything you may find it snaps on heavier fabrics. A lot of us self taught sewers learn this the hard way.
There are so many to choose from for so many different purposes. So interesting! 🙂
Step by step procedure is very clear. I love sewing and bookmarking your page.
This is a really nice and in depth post on choosing the correct needle. There are such a variety that finding the correct one becomes quite confusing so good to have a guide!
I have a question not a comment,
What needle manufacture do you use?
I use Schmetz 99% of the time. I have used Inspira in the past and liked them too.