
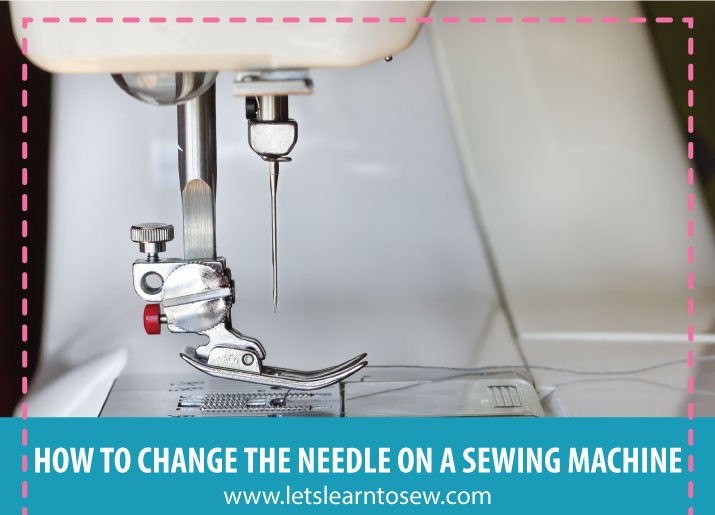
Is your sewing machine skipping stitches, breaking thread, making unusual sounds, or creating uneven stitches? Before assuming something is wrong with your machine, check the needle.
A dull, bent, damaged, or incorrectly installed sewing machine needle can cause all kinds of stitching problems. Fortunately, changing the needle is quick, easy, and one of the most important sewing machine maintenance tasks you can learn.
Whenever I have any type of problem with my sewing machine, I do two things:
- Check the needle.
- Rethread the machine.
Seriously, those two simple steps solve the majority of sewing machine problems I encounter. More than half the time, the needle is the problem.
Signs You Need to Change Your Sewing Machine Needle
Your sewing machine needle may need to be replaced if you notice:
- Skipped or uneven stitches
- Thread that repeatedly breaks
- Fabric puckering
- Snags or runs in delicate fabric
- Popping, clicking, or thumping sounds while sewing
- A bent or visibly damaged needle
- Burrs or nicks on the needle
- The needle striking the presser foot or needle plate
- Poor stitch quality that continues after rethreading the machine
You should also consider changing the needle after sewing coarse or heavy fabrics, such as denim, canvas, or upholstery fabric.
Before You Change the Needle
Before getting started:
- Turn off your sewing machine.
- Raise the presser foot.
- Have the correct replacement needle ready.
- Locate the screwdriver that came with your machine, if one is required.
- Check your sewing machine owner’s manual for any model-specific instructions.
Most home sewing machines use the same basic needle-changing process, but the correct needle orientation can vary between machines. Always follow the instructions for your particular model.
How to Change the Needle on a Sewing Machine
Step 1: Raise the Needle
Turn the handwheel toward you until the needle is in its highest position.
Always turn the handwheel toward you unless your machine’s manual specifically instructs otherwise. Turning it in the wrong direction can affect the machine’s timing or cause the thread to tangle.
Step 2: Cover the Needle Plate
Place a scrap of fabric or a small piece of paper over the needle plate and underneath the presser foot.
This simple step prevents the needle from accidentally falling through the opening in the needle plate and into the sewing machine.
Step 3: Loosen the Needle Clamp Screw
Hold the needle securely with one hand. With your other hand, loosen the needle clamp screw.
Depending on your machine, you may be able to loosen the screw by hand, or you may need to use the small screwdriver included with your sewing machine.
You usually only need to loosen the screw enough to release the needle. You do not need to remove the screw completely.
Step 4: Remove the Old Needle
Carefully pull the old needle straight down and out of the needle clamp.
Set it aside somewhere safe until you can dispose of it properly. Never leave an old needle loose on your sewing table or place it directly into the trash where someone could be injured.
An empty prescription bottle, sharps container, or another sturdy container with a secure lid works well for storing used sewing machine needles.
Step 5: Check the New Needle
Before installing the new needle, make sure it is the correct type and size for your fabric and thread.
You should also check that the needle is straight. Place the flat side of the needle on a level surface. The needle shaft should sit evenly and should not appear bent.
Never sew with a bent needle. It can break while you are sewing, damage your machine, or cause an injury.
Step 6: Insert the New Needle
For most home sewing machines, the flat side of the needle faces the back of the machine. However, some machines require a different orientation, so check your owner’s manual if you are unsure.
Hold the needle with the flat side facing the correct direction. Slide it upward into the needle clamp as far as it will go. The top of the needle should reach the needle stopper.
If the needle is not pushed completely into the clamp, it can cause skipped stitches, thread breakage, or problems with the needle striking the machine.
Step 7: Tighten the Needle Clamp Screw
Continue holding the needle in place while tightening the needle clamp screw securely.
The screw should be snug enough to hold the needle firmly, but do not overtighten it. Overtightening may damage the screw or needle clamp.
Step 8: Check the Needle Position
Remove the fabric or paper covering the needle plate.
Before turning the machine on, slowly turn the handwheel toward you through one complete stitch cycle. Watch the needle as it moves through the opening in the needle plate.
The needle should move freely without hitting the presser foot, needle plate, or bobbin area.
Step 9: Rethread and Test the Machine
Rethread the sewing machine and sew a few test stitches on a scrap of the same fabric you will be using for your project.
Check that the stitches are even and that the machine is sewing smoothly. If you still notice skipped stitches, thread breakage, or unusual sounds, confirm that:
- The needle is inserted all the way into the clamp.
- The flat side is facing the correct direction.
- The needle type and size are suitable for the fabric.
- The machine is threaded correctly.
- The bobbin is inserted properly.
How Often Should You Change a Sewing Machine Needle?
If you have never changed the needle on your sewing machine, now is the time. If you cannot remember the last time you changed it, it is probably time for a new one.
A good general guideline is to replace your sewing machine needle after approximately eight hours of sewing. You can also begin each new project with a fresh needle, especially when working with delicate, expensive, heavy, or specialty fabrics.
Even when a needle looks fine, its point gradually becomes dull with use. A worn needle can damage fabric, create poor-quality stitches, and place unnecessary stress on the thread and sewing machine.
Change the needle immediately if it:
- Becomes bent
- Develops burrs or nicks
- Hits the needle plate or presser foot
- Breaks
- Begins making a popping or thumping sound
- Causes skipped stitches or repeated thread breakage
- Has been used to sew very thick or coarse fabric
Can You Straighten and Reuse a Bent Needle?
No. Never try to straighten and reuse a bent sewing machine needle.
Once a needle bends, it is weakened and more likely to break. It may also strike the needle plate, damage the bobbin area, or cause an injury. Remove it and replace it with a new needle before continuing to sew.
Can You Use the Same Needle for Every Fabric?
No. Sewing machine needles come in different types and sizes because different fabrics have different needs.
For example, knit fabrics generally require a ballpoint or stretch needle, while denim requires a strong denim or jeans needle. Using the wrong needle can result in skipped stitches, damaged fabric, broken thread, or a broken needle.
If you are unsure which needle your project requires, read our guide on How to Choose the Correct Sewing Machine Needle.
Quick Sewing Machine Needle Change Checklist
- Turn off the sewing machine.
- Raise the presser foot and needle.
- Cover the needle plate.
- Hold the old needle while loosening the clamp screw.
- Remove and safely dispose of the old needle.
- Choose the correct replacement needle.
- Insert the new needle in the proper direction.
- Push the needle all the way into the clamp.
- Tighten the needle clamp screw securely.
- Turn the handwheel slowly to check the needle’s movement.
- Rethread the machine.
- Test the stitches on scrap fabric.
Check the Needle, Rethread the Machine
Learning how to change a sewing machine needle is an essential skill for every sewist. It only takes a few minutes, but a fresh, properly installed needle can solve many common sewing problems and make a noticeable difference in your stitch quality.
When your sewing machine starts acting up, remember to check the needle and rethread the machine first. Those two simple steps may be all you need to get back to sewing.


So crazy because last night I was wondering if I wanted to buy one in the near future to create some DIY
A new needle every 8 hours of sewing? Wow, that seems pretty frequent! I had no idea. I will have to watch for that, as I generally only change it if it breaks, bends, or otherwise shows obvious signs of wear.
Very helpful post. I used to sew but I haven’t for years now. It was kinda fun.
I dont sew at all, so these sounds like some good tips to me!
Thank you for great tips!
I’m really glad I found your blog because I recently bought a sewing machine to do some DIY projects! Awesome content !
I find it hard to use sewing machine, especially when you change the needle and with your tips, it looks like easier now.
Really great tips, thank you 🙂
I follow your site and its really helpful for all . Definitely great tips .
What are the essentials of learning how to sow for the first time in your life?