Learn how to add a dart to a dartless bodice, in two ways! Plus, one of them can be used for a full bust adjustment!
So, you need to add a dart to a dartless bodice? Awesome, that means maybe you drafted your bodice block the easy way… Basically, you take your body measurements, plot your points, and connect the dots. Easy! Well, guess what!? Adding darts is pretty easy too! Let’s see how it’s done!
How to add a dart, two ways….
Just like anything else, there is always more than one right way to achieve something. The same goes for adding a dart to a dartless bodice. Let’s take a look at the two ways I use…
Adding a dart, the easy way
If you’ve drafted a bodice the easy way, it is equally as easy to add a dart! Don’t get too worried about everything being perfect! That will be your Achilles heel…You are always going to sew a muslin for fitting, so you’ll be able to make any necessary adjustments at that time!
Step 1 – Measure down from the HPS (high point of shoulder) and mark the bust point. Make sure to stay parallel to the grainline, or CF (center front).
Step 2 – Continue line through to the bottom of the pattern (waist), again staying parallel to the grainline or CF.
Step 3 – Decide how wide you want your dart to be. Divide that number in half. Add half the measurement to one side of the line at the bottom of the pattern (waist) and mark. Then, add the other half to the other side of the line and mark.
Step 4 – Draw in the dart legs
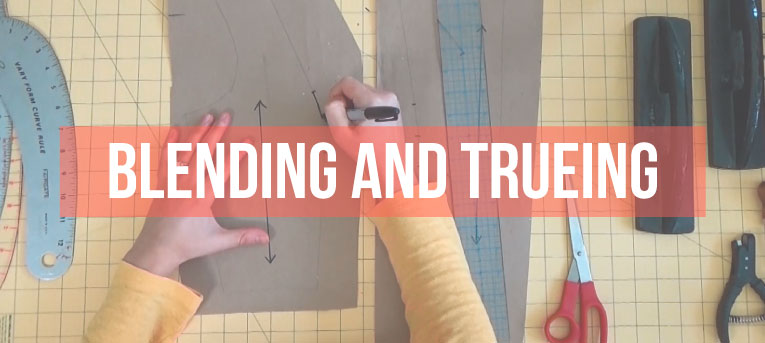
Step 5 – Take the full width of the dart and pivot open the side seam. Blend and true all your seams.
You can do this one of two ways. First, simply measure and redraw the line using your clear plastic ruler. Or, cut along the side seam from the waist to the underarm and pivot the seam open.
Once you’ve completed adding the dart to the dartless bodice, you can always pivot this dart anywhere on the bodice by using dart manipulation! Cool, huh!?
The method used in this video can be used for a full bust adjustment. Keep in mind, the bodice patterns used in both techniques discussed in this article… usea bodice sloper. That means, it has no seam allowance and no wearing ease. They are not finished garment patterns.
Also, when performing the method discussed in the video, you will add fullness to the bust. This technique should only be used if you need more fullness in the bust.