You have the pattern selected, purchased some fabric that you think will create a fantastic look, and now it’s time to start cutting. In this article, I will cover the top 5 mistakes to avoid before cutting fabric.
1. Not washing the fabric before cutting.
One of the questions I get asked most often is, “Do I need to prewash my fabric?”. The answer is it depends. If the final project will never be washed, then no, you don’t have. If the final project will be washed, it needs to be washed before you cut it.
Natural fibers come from plant material or animals. When these fibers come in contact with water, they relax, but by applying heat once again, the fibers return to their original state. It usually will take several washes for some fabrics to relax. I suggest washing fabric based on the care instruction on the bolt or how you plan to wash the final project. If you always wash clothes in warm water, wash the fabric in warm water. We have a post devoted to getting your fabric ready to sew and the importance of washing it.
2. Not Squaring the Fabric.
Squaring up fabric involves making sure the lengthwise and crosswise grains are at a 90-degree angle to each other. It’s also called “on-grain” or finding the “straight-of-the-grain.”
How to Square fabric
- Preshrink the fabric if the finished project will be washed.
- Press the fabric lightly to remove wrinkles or creases.
- Fold the fabric, so the selvages are together, hold it up, and let it hang free. Adjust the selvages by sliding the fabric left and right until there are no more ripples in the fabric. The raw edges will more than likely NOT be lined up.
- Keep the selvages together and lay the fabric on your board or mat with the gridlines. Line up the fold or the selvages with one of the horizontal lines.
- Take a yardstick and line it up with a vertical line on the mat or cutting board close to the fabric’s end. The yardstick should be parallel to the raw edge.
- Hold the yardstick securely and draw a line. The line should be at a 90-degree angle to both the fold and the selvages.
- Use fabric scissors and cut carefully along the line making sure the fabric doesn’t shift.
- The selvages are straight, and so is the raw edge you just cut. The fabric is now squared up and ready to be used for your project.
3. Not Following Pattern Instructions for Placement of the Fabric grain.
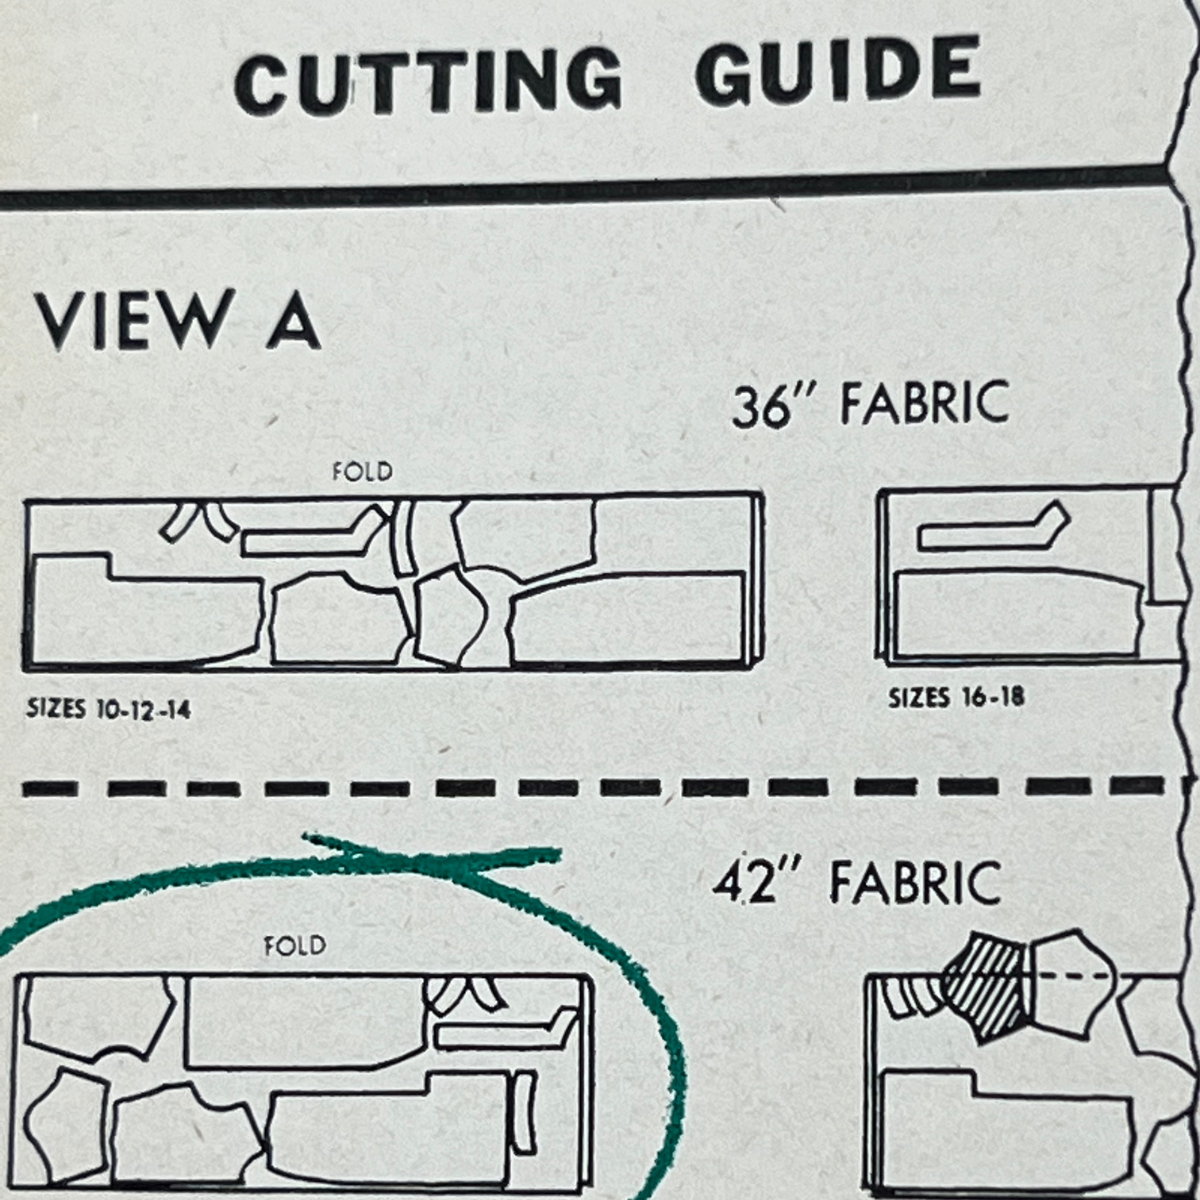
The grainline tells where and in what direction your pattern piece should be placed on your fabric. The grain line is always parallel to the selvage. If your pattern piece should be laid lengthwise, crosswise, or on the bias, the grainline will tell you (as well as the layout guide). The pattern layout guide is created by the pattern company and included in every commercial pattern.
To learn more about layouts, go to this Threads Magazine’s article, Pattern Layouts.
4. Not Having Enough Fabric to Match Plaids or Stripes.
This mistake is easily avoided by buying more fabric than is required and placing the pattern, so it matches the prints or plaid. As a rule, how much fabric you will need will always depend on your size based on measurements and the width of the fabric you intend to use.
5. Using the Wrong Fabric Type
One of the biggest mistakes I saw while teaching sewing classes for a big chain was students came to class with the wrong fabric. Imagine if your favorite t-shirt was made of non-stretch fabric. You’d never get it over your head.
Follow the instructions on the back of the pattern envelope. It will be marked what fabric will best suit the pattern, study the drawing, and see how the garment falls away or clings to the body.
This article will help you choose the correct fabric if you’re unsure what to look for, Fabric 101: A Guide to Choosing Fabric.
Cut with Confidence!
Before cutting fabric, take the time to prepare your fabric and avoid the top 5 mistakes. c will help ensure the time you spend constructing the project will not be wasted.
Want to start sewing but need a helping hand with the basics? Our Sewing 101 course has everything you need to know to get started sewing with confidence and improve the skills you already have.