Why pockets matter when you sew your own clothes
Knowing the different types of pockets in sewing lets you add the perfect pocket to everything you make. Pockets are one of the first things people check when they try on a new garment. When you sew your own clothes, you get to decide where they go, how big they are, and what style they are. No more dresses without pockets!
This guide walks you through the most common types of pockets in sewing. For each one you’ll learn what it is, where you’ll see it, how hard it is, and how to sew it step by step.
If you’re just getting started, begin with a patch pocket. It’s the easiest pocket to sew, and it teaches you skills you’ll use on every other style.
Brand new to sewing? Start with our Sewing 101 course. It covers the basics you’ll use for every pocket in this guide.
Good to know: if you’re using a Let’s Learn To Sew pattern, the seam allowance is already included. If you’re drafting your own pocket, add seam allowance to every edge before you cut.
Types of pockets in sewing at a glance
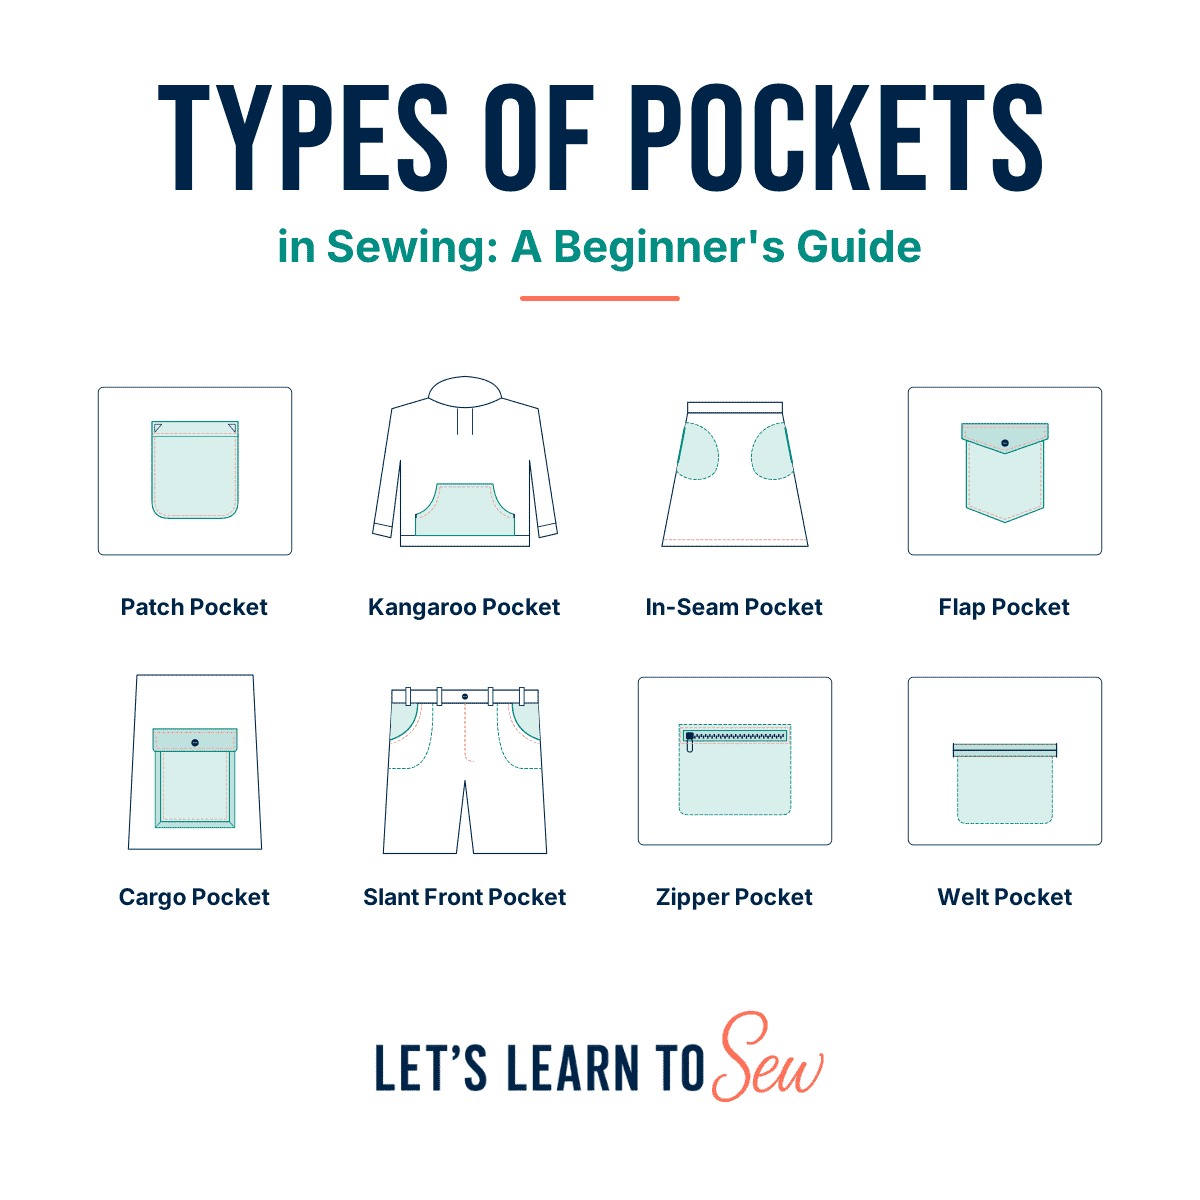
| Pocket type | Where you’ll see it | Skill level |
|---|---|---|
| Patch pocket | Shirts, aprons, jackets, tote bags | Beginner |
| Kangaroo pocket | Hoodies, sweatshirts, kids’ tops | Beginner |
| In-seam pocket | Dresses, skirts, pajama pants | Beginner |
| Flap pocket | Shirts, shackets, jackets | Confident beginner |
| Cargo (bellows) pocket | Cargo pants, utility jackets | Intermediate |
| Slant front pocket | Jeans, trousers, shorts | Intermediate |
| Zipper pocket | Jackets, activewear, bags | Intermediate |
| Welt pocket | Blazers, coats, dress pants | Advanced |
Sewing 8 common types of pockets, step by step
The pockets are listed from easiest to hardest. Each one builds on the skills from the one before it.
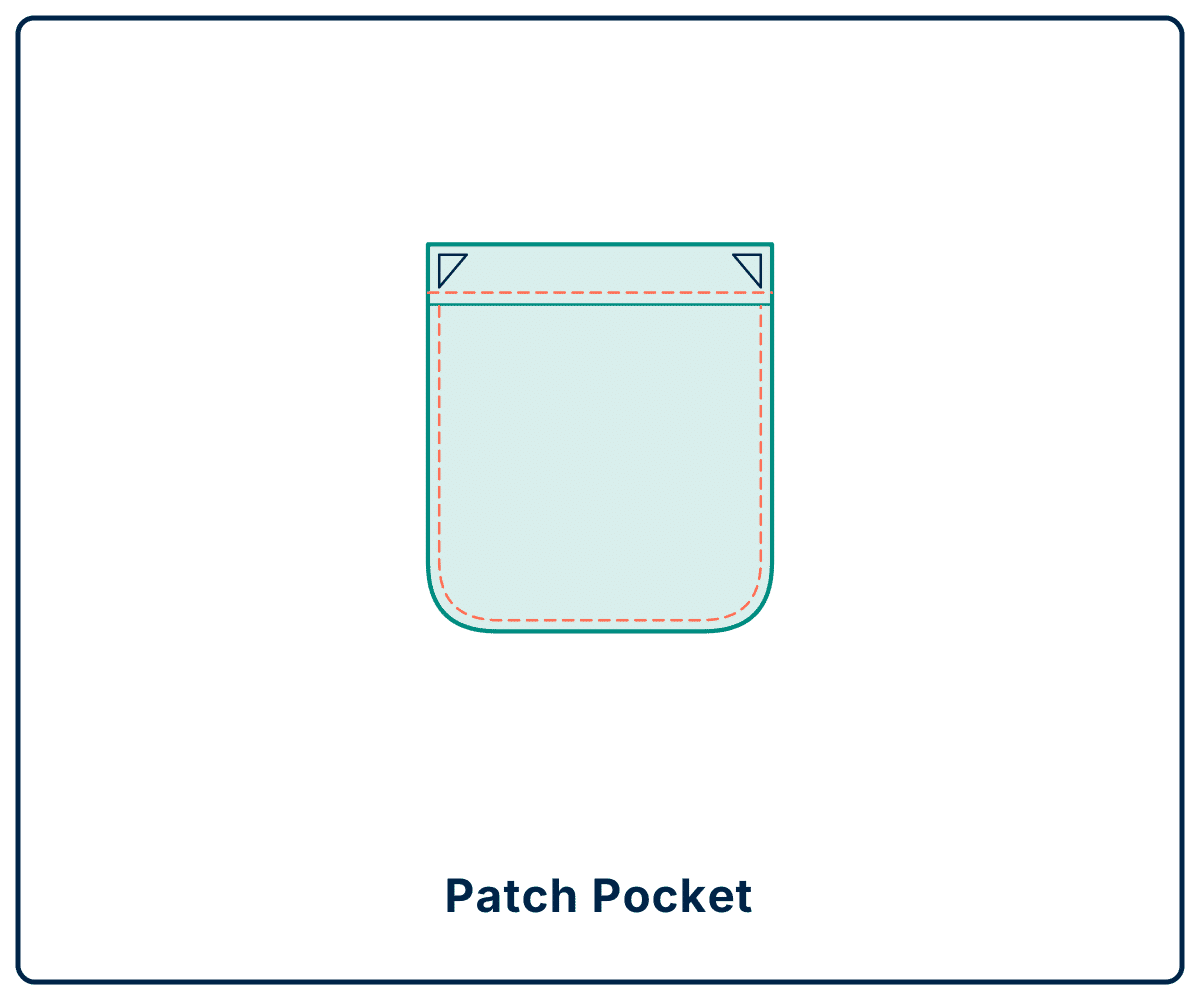
1. Patch pocket
A patch pocket is a piece of fabric you sew onto the outside of a garment. It’s the easiest pocket to sew and the best place for beginners to start.
Where you’ll see it: shirts, aprons, jackets, tote bags and kids’ clothes.
How to sew a patch pocket:
- First, fold the top edge of the pocket down 1/4 inch and press. Fold it again by the hem amount on your pattern (often 1 inch) and press.
- Next, stitch the hem in place close to the folded edge.
- Then press the seam allowance on the sides and bottom to the wrong side. For rounded corners, sew a line of long basting stitches around the curve, then pull the thread to ease the fabric in before pressing.
- After that, pin or glue-baste the pocket in place on the garment. Measure to make sure it’s straight.
- Afterward, edgestitch around the sides and bottom, about 1/8 inch from the edge.
- Finally, reinforce the top corners with a small triangle or a few backstitches. This is where pockets tear first.
Beginner tip: cut a pocket template from cardstock without seam allowance. Press the fabric edges over the template for perfectly even sides.
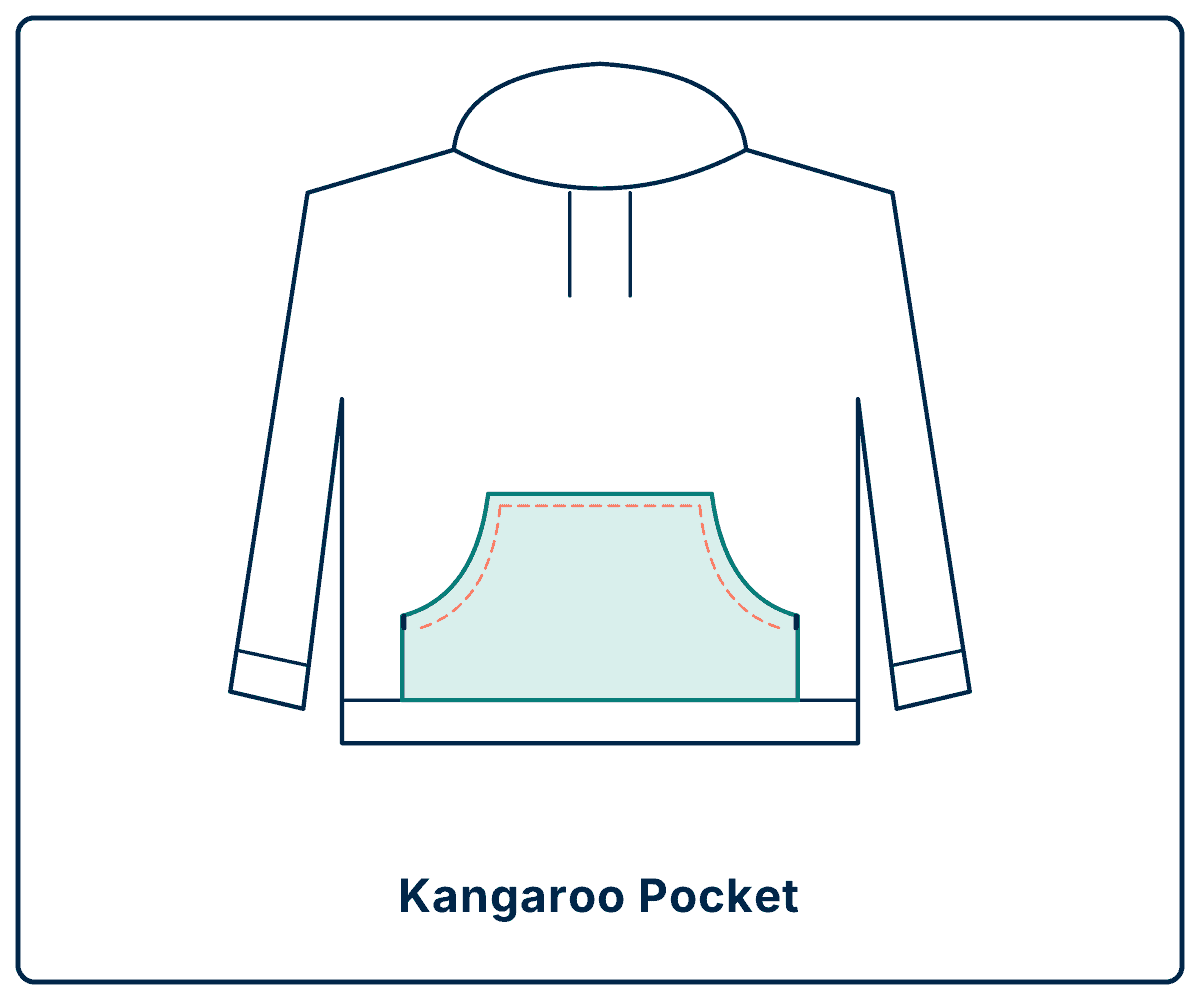
2. Kangaroo pocket
A kangaroo pocket is one large pocket across the front of a top, open on both sides so you can tuck your hands in. It’s sometimes called a pouch pocket.
Where you’ll see it: hoodies, sweatshirts and kids’ tops.
How to sew a kangaroo pocket:
- First, finish the two side openings. Fold and topstitch them, or bind them with a strip of fabric or ribbing.
- Next, press the top edge and any other edges that will be sewn down to the wrong side.
- Then pin the pocket to the front of the garment, centered.
- After that, topstitch along the top edge. Leave the bottom edge loose if the hem or waistband seam will catch it.
- Finally, reinforce the top corners of the side openings with backstitching.
Beginner tip: on knit fabric, use a stretch stitch or a narrow zigzag so the stitches don’t pop.
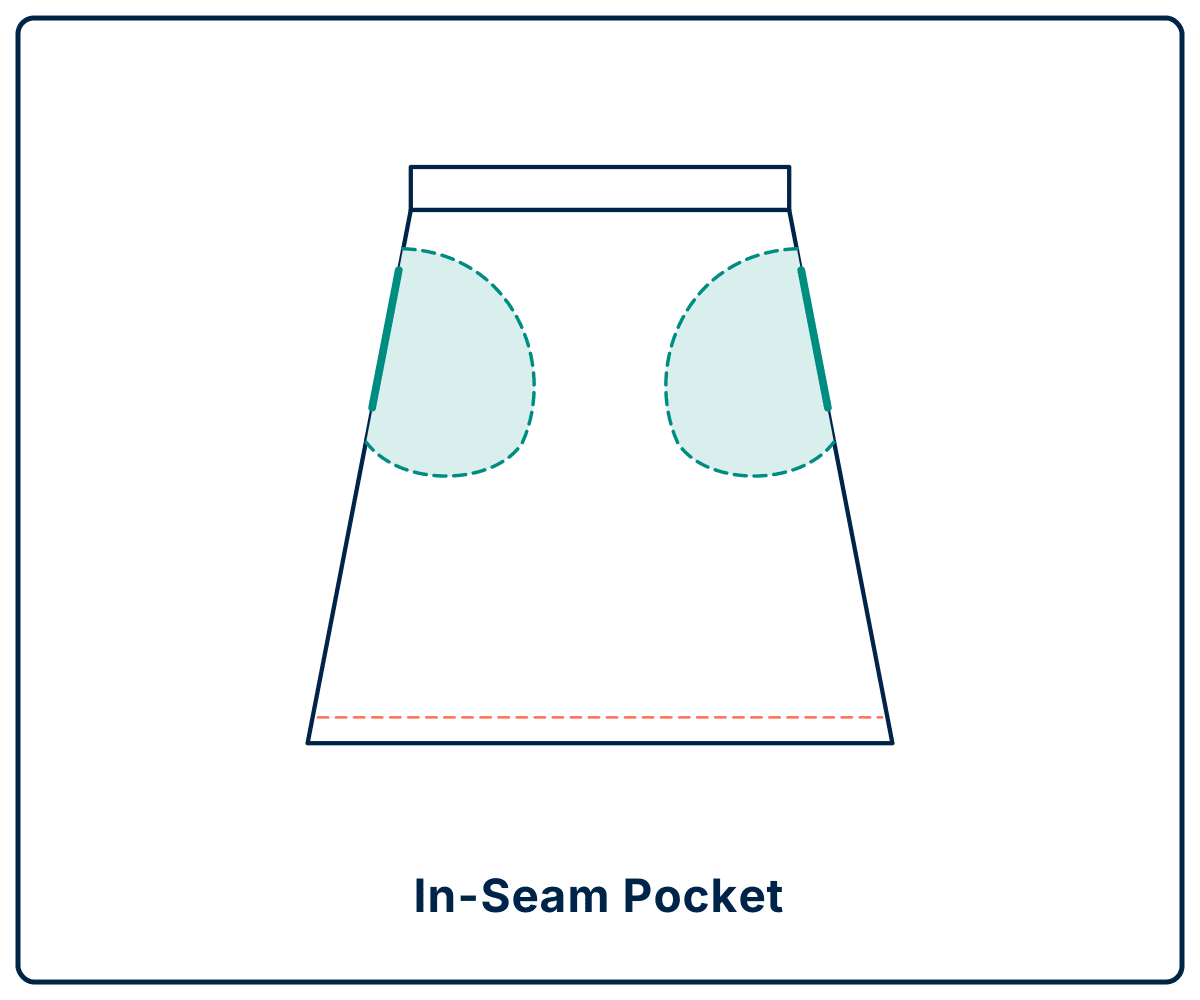
3. In-seam pocket
An in-seam pocket hides inside the side seam of a garment. From the outside you only see a small opening in the seam.
Where you’ll see it: dresses, skirts, pajama pants and casual pants.
How to sew an in-seam pocket:
- First, sew one pocket bag to the side seam of the front piece, right sides together. Sew the second pocket bag to the back piece the same way.
- Next, press the pocket bags away from the garment, with the seam allowances pressed toward the pocket.
- Then understitch the front pocket bag to keep it from peeking out.
- After that, place the front and back right sides together, matching the pocket bags.
- Afterward, sew the side seam, pivoting around the pocket bag and back down the side seam. Backstitch at the top and bottom of the pocket opening.
- Finally, finish the seam allowances and press the pocket toward the front.
Beginner tip: clip the back seam allowance just above and below the pocket so it lies flat.
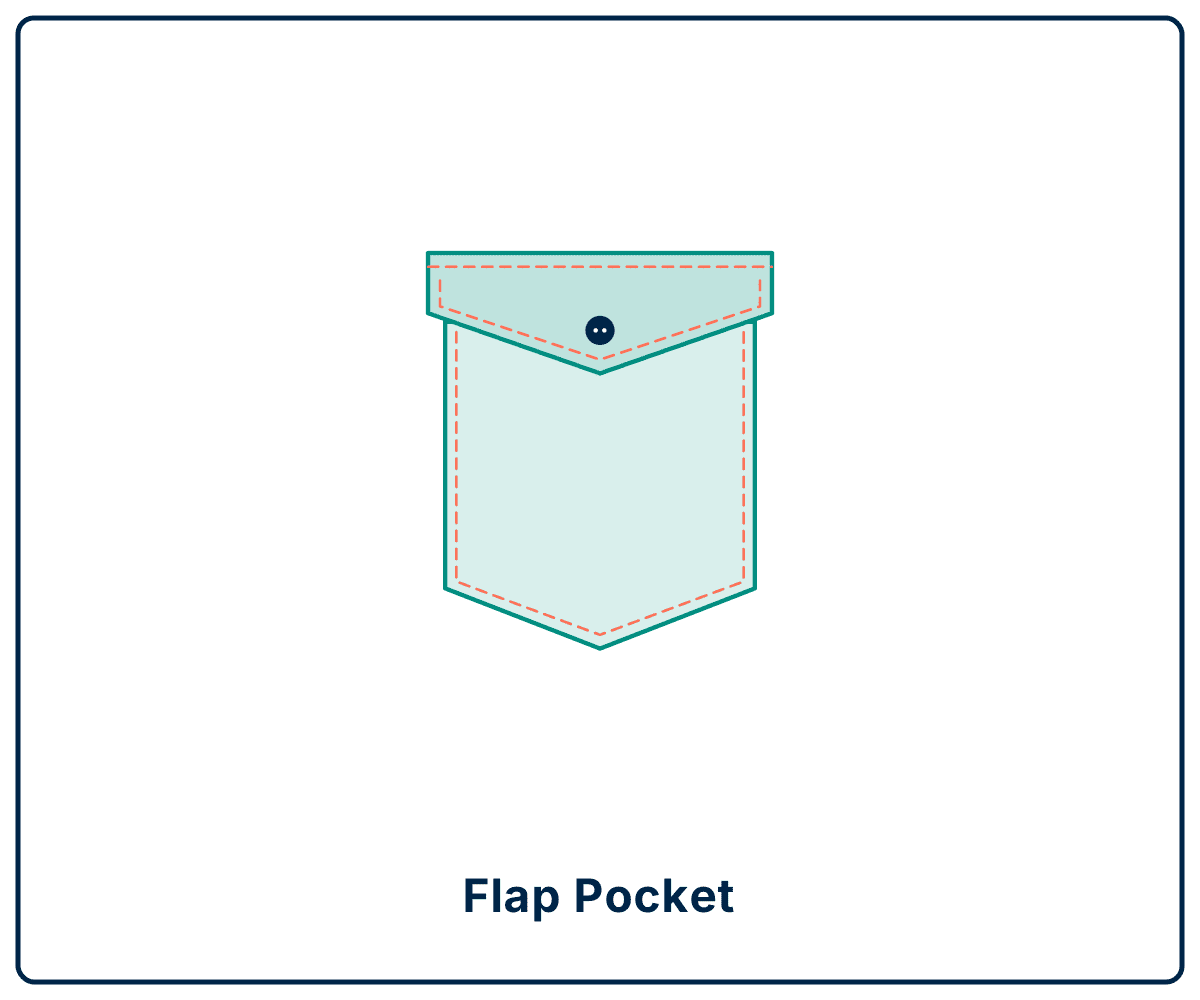
4. Flap pocket
A flap pocket is a patch pocket with a flap that folds down over the opening. The flap can close with a button or snap, or just be decorative.
Where you’ll see it: button-up shirts, shackets, western shirts and jackets.
How to sew a flap pocket:
- First, sew the patch pocket to the garment (see the patch pocket steps above).
- Next, interface one flap piece. Sew the two flap pieces right sides together around the sides and bottom, leaving the top open.
- Then trim the seam allowance, clip the corners, turn right side out and press. Topstitch if you like.
- After that, add the buttonhole if your flap closes with a button.
- Afterward, place the flap upside down above the pocket, raw edge facing the pocket opening, and stitch across.
- Finally, trim the seam allowance, fold the flap down and topstitch across the top to hold it in place.
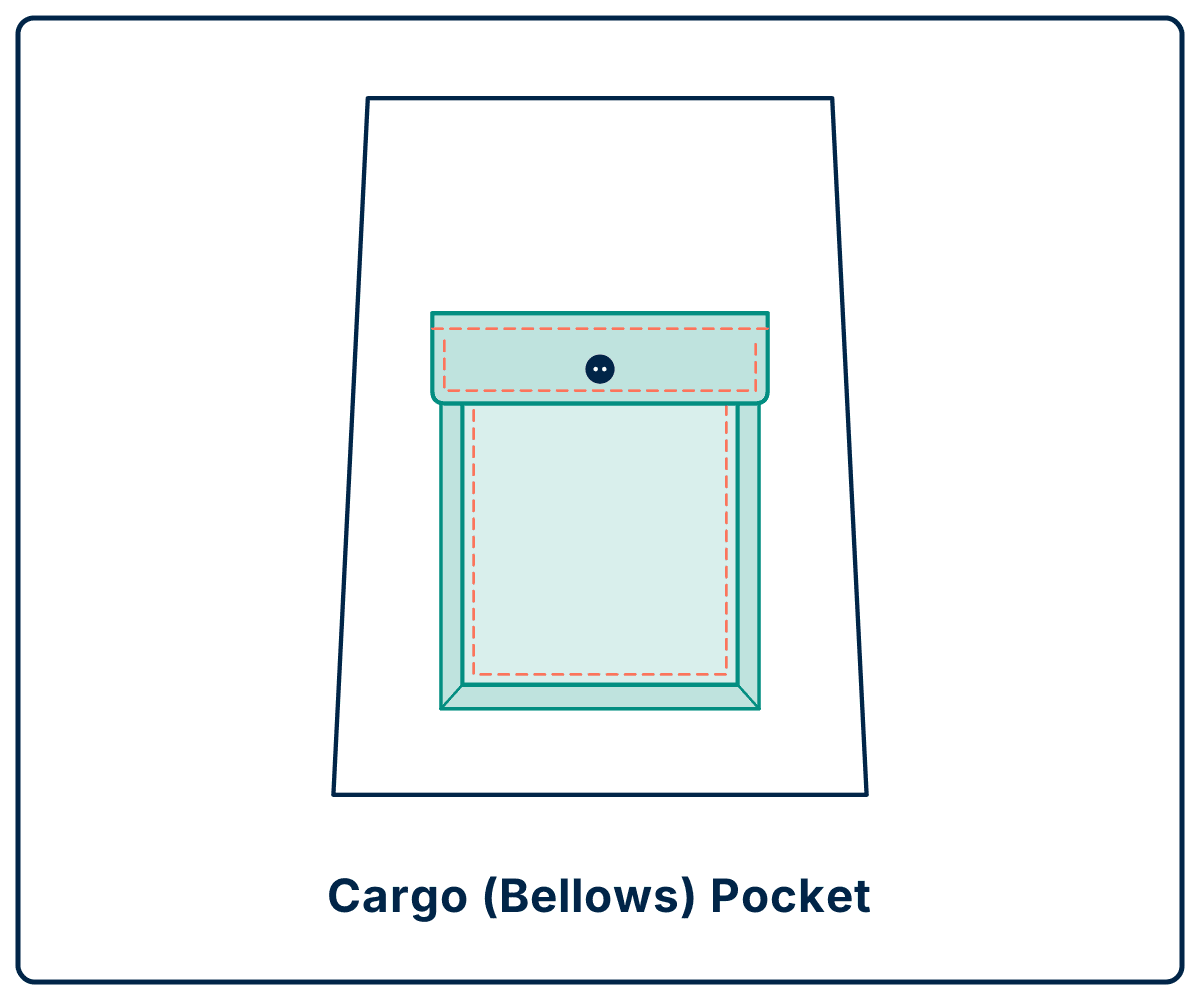
5. Cargo pocket (bellows pocket)
A cargo pocket is a large patch pocket with pleated sides that expand to hold more. Bellows pockets often have a flap on top.
Where you’ll see it: cargo pants, utility jackets and work wear.
How to sew a cargo pocket:
- First, hem the top edge of the pocket.
- Next, press in the side and bottom pleats along the lines marked on your pattern.
- Then pin the pocket to the garment and stitch along the outer fold lines close to the edge.
- After that, bar tack or backstitch the top corners. Cargo pockets hold heavy things, so these corners need extra strength.
- Finally, add a flap above the pocket (see the flap pocket steps above).
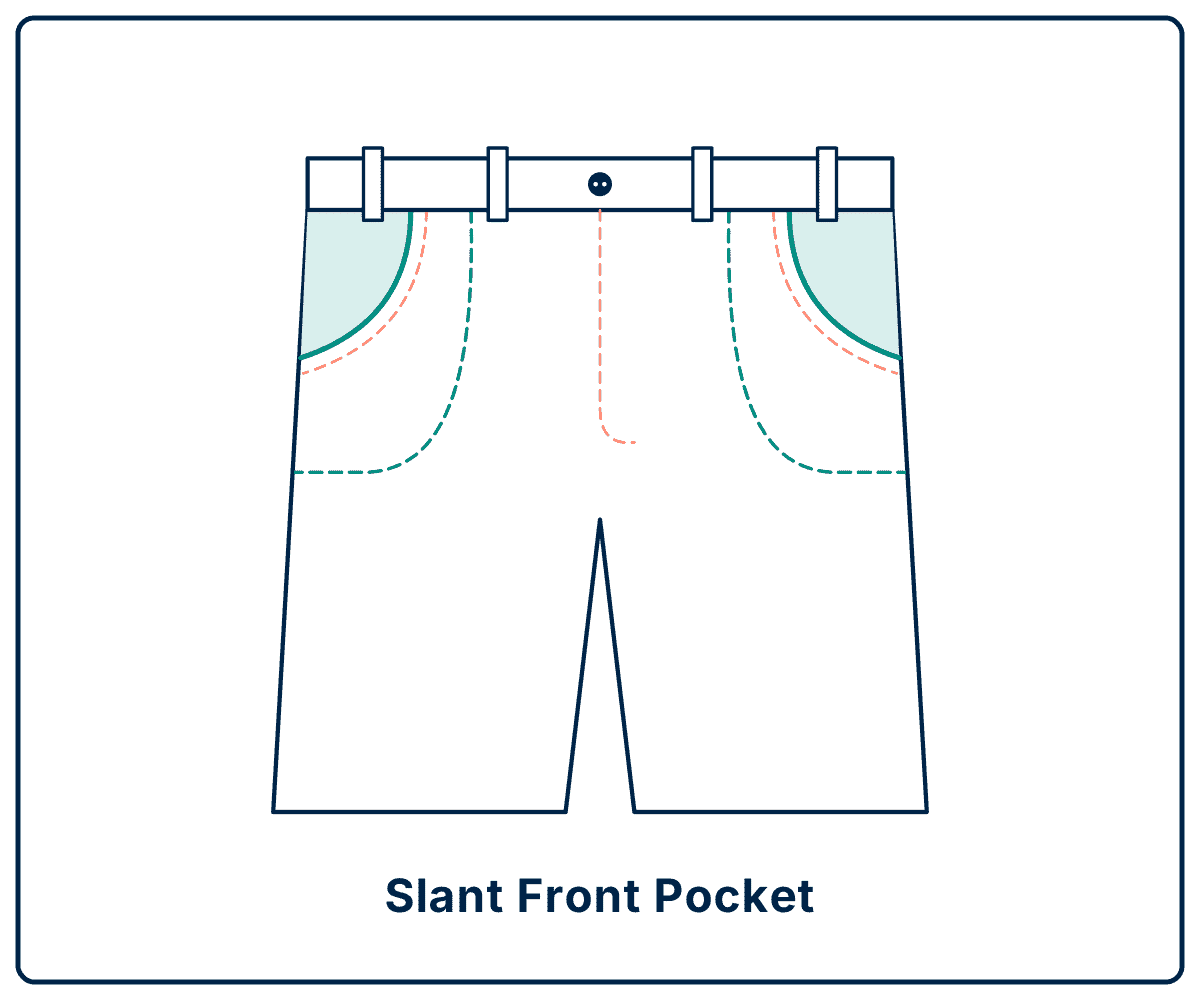
6. Slant front pocket
A slant front pocket is the curved or angled pocket on the front of jeans and trousers. It has a facing, a pocket bag and a side piece that shows through the opening.
Where you’ll see it: jeans, trousers, chinos and shorts.
How to sew a slant front pocket:
- First, staystitch the pocket opening or add a strip of stay tape so the curve doesn’t stretch.
- Next, sew the pocket facing (or lining) to the opening, right sides together.
- Then trim, clip the curve, understitch and press the facing to the inside.
- After that, topstitch along the opening.
- Afterward, place the pocket bag with the side piece (sometimes called the yoke) under the opening. Match the markings and baste at the waist and side seam.
- Finally, sew the bottom of the pocket bag closed and finish the edges.
Beginner tip: check the pocket opening against the waistband before you baste. A gaping pocket is usually a sign the opening stretched.
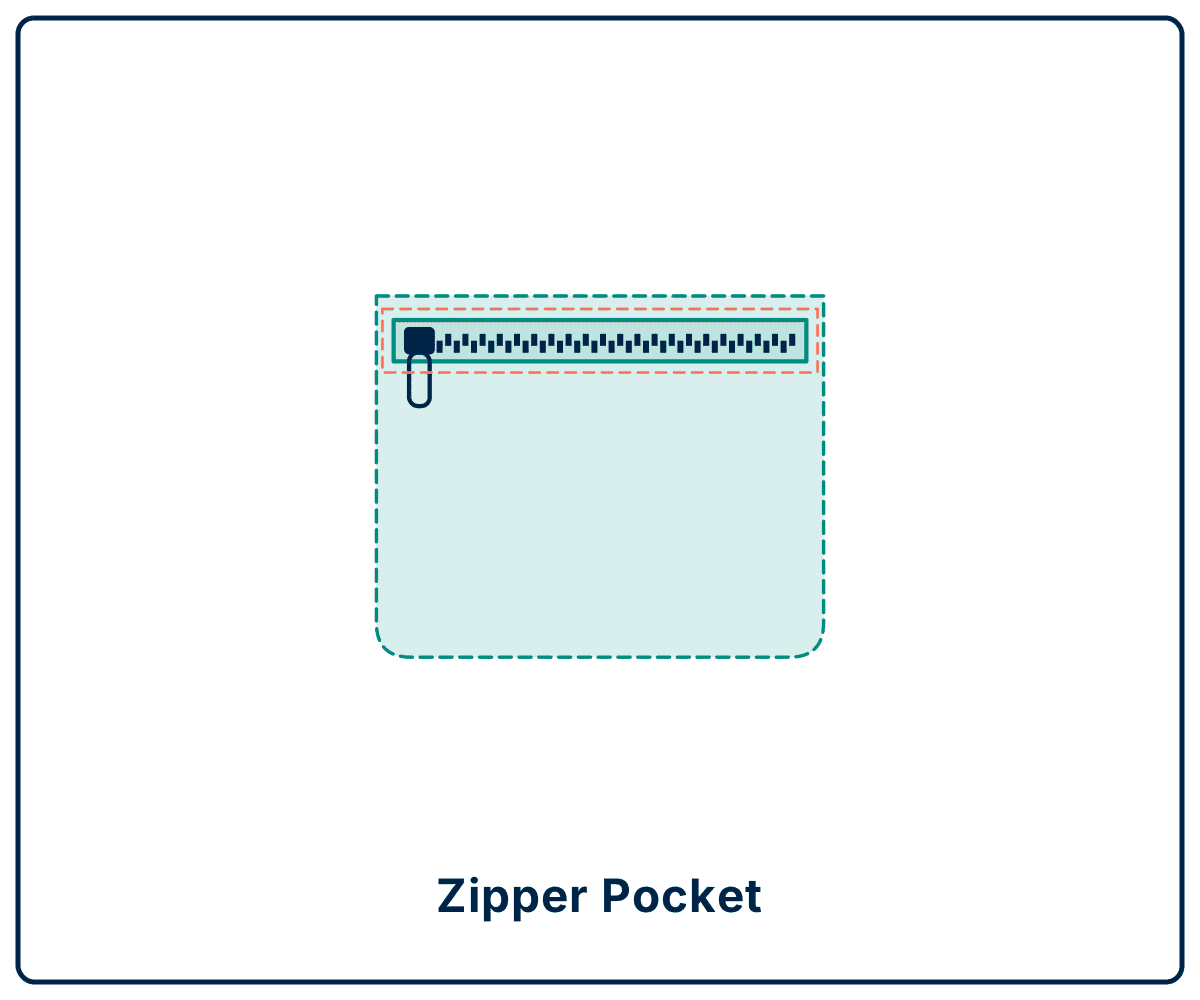
7. Zipper pocket
A zipper pocket closes with a zipper, so nothing falls out. You can set the zipper in a welt opening or sew it into a seam.
Where you’ll see it: jackets, activewear, travel clothes and bags.
How to sew a basic zipper welt pocket:
- First, interface the wrong side of the garment where the pocket will go.
- Next, pin a pocket facing to the right side of the garment and mark a long, narrow rectangle the length of your zipper teeth.
- Then stitch around the rectangle with a short stitch length.
- After that, cut down the center and clip into each corner, stopping just short of the stitches.
- Turn the facing to the inside and press to make a neat window.
- Afterward, place the zipper behind the window and topstitch around it.
- Finally, sew the pocket bag pieces to the facing and the zipper tape, then sew the bag closed.
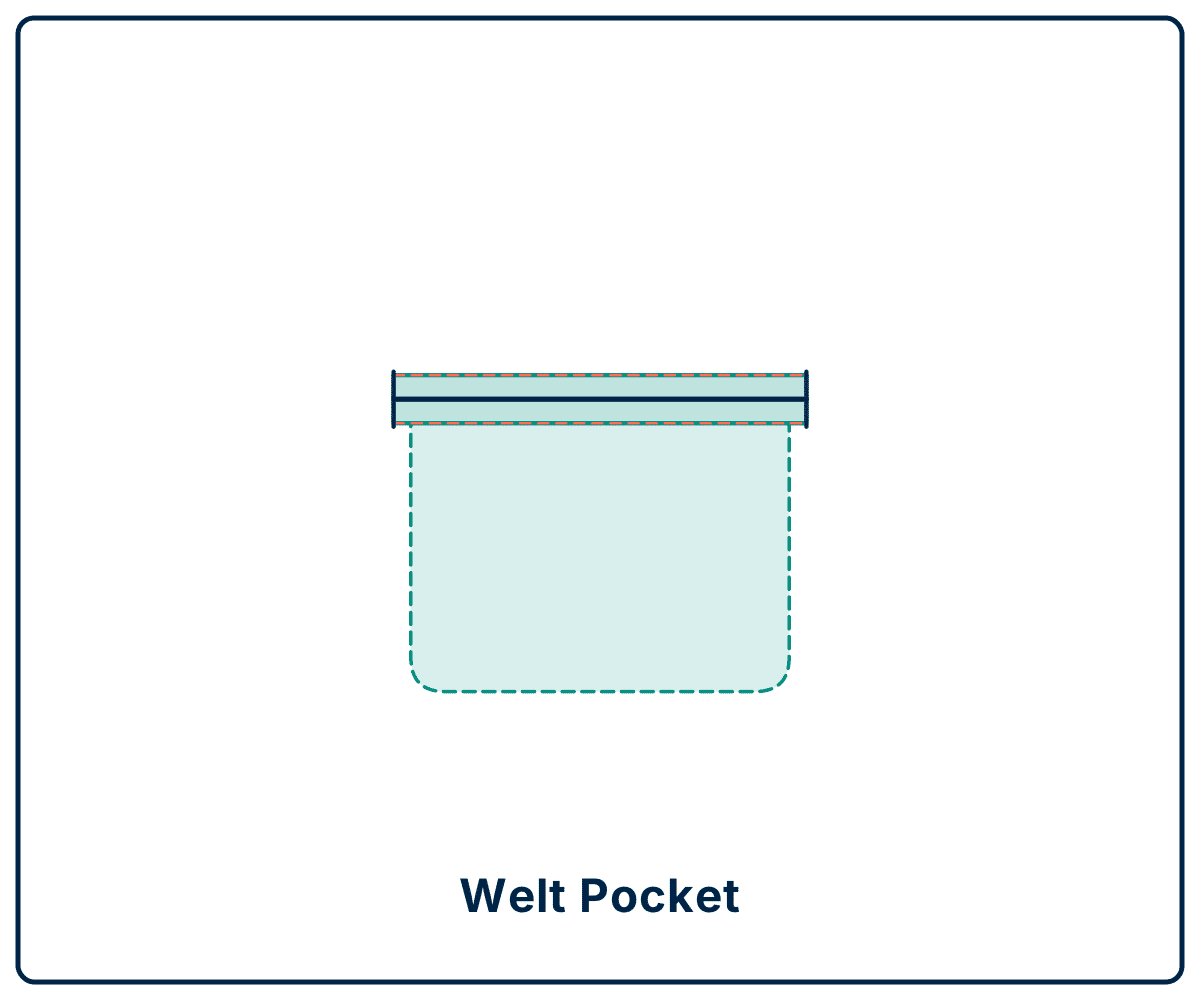
8. Welt pocket
A welt pocket is a slit pocket with a narrow strip of fabric, called a welt, along the opening. A single welt has one strip, and a double welt (or jetted pocket) has two thin lips. It’s the most tailored pocket and a big confidence boost when you finish your first one.
Where you’ll see it: blazers, coats, vests and dress pants.
How to sew a double welt pocket:
- First, interface the back of the pocket area on the garment.
- Next, mark the pocket opening carefully with two parallel lines and a center line.
- Then fold and press the welt strips in half lengthwise. Place them on the right side of the garment with the raw edges meeting at the center line.
- After that, stitch each welt along its marked line. Stop exactly at the ends and backstitch.
- From the wrong side, cut along the center line. Stop about 1/2 inch from each end and clip diagonally into the corners to make small triangles. Don’t cut the stitches.
- Afterward, push the welts through to the inside. Press so the two lips meet in the middle.
- Then fold the garment back and stitch across each small triangle to secure the ends.
- Finally, sew the pocket bag pieces to the welts and stitch the bag closed.
Beginner tip: practice on a scrap first. Your first welt pocket on scrap fabric makes the real one much less scary.
How to choose between types of pockets in sewing
When choosing between types of pockets in sewing, start with how the garment will be worn. Then match the pocket to your skill level.
- Everyday and casual clothes: patch, kangaroo and in-seam pockets are quick to sew and easy to use.
- Dresses and skirts: in-seam pockets keep the lines smooth, so the pocket doesn’t show.
- Shirts and shackets: patch or flap pockets on the chest give a classic look.
- Pants and jeans: slant front pockets in front, patch or welt pockets in back.
- Outerwear and work wear: cargo and zipper pockets hold more and keep things secure.
- Tailored pieces: welt pockets give blazers and coats a polished finish.
Match the pocket fabric to the garment, too. Thick fabrics like wool or denim do best with a lighter cotton pocket bag to cut down bulk.
Best types of pockets for different sewing fabrics
Not all types of pockets in sewing work with every fabric. A welt pocket that looks crisp in wool can turn into a wavy mess in a stretchy knit. Use this table to match your pocket to your fabric.
| Fabric | Pockets that work well | Pockets to avoid or rethink | Tips |
|---|---|---|---|
| Knits (jersey, French terry, sweatshirt fleece) | Kangaroo, patch, in-seam | Welt and zipper pockets, unless you’re experienced | Use a stretch stitch or narrow zigzag. Add fusible knit interfacing or a strip of stay tape to pocket openings so they don’t stretch out |
| Denim and canvas | Patch, slant front, cargo, flap | Double welt (too bulky for most home machines) | Use a denim needle and a lighter cotton for pocket bags. Bar tack the corners |
| Lightweight cotton and linen | Patch, in-seam, flap | Heavy cargo pockets (they pull and sag) | Cut pocket bags from the same fabric. Interface flaps so they hold their shape |
| Slippery fabrics (rayon, satin, silk) | In-seam | Patch pockets (hard to keep straight) and welt pockets | Use spray starch or tissue paper under the fabric while sewing. Stabilize the pocket opening with stay tape |
| Wool and coating | Welt, flap, patch | Kangaroo (too bulky) | Use a smooth lining fabric for pocket bags. Press with a press cloth to avoid shine |
| Polar fleece and minky | Patch, kangaroo, zipper | Welt pockets (fleece won’t press crisp) | Skip pressing (heat can melt fleece). Use a walking foot and a longer stitch length |
Beginner tip: if you’re unsure, sew a test pocket on a scrap of your fabric first. You’ll see right away how it behaves.
Troubleshooting common problems when sewing pockets
| Problem | Why it happens | How to fix it |
|---|---|---|
| Pockets are crooked or uneven | You eyeballed the placement | Measure from the center front and hem, mark both pockets with chalk, and check with a ruler before stitching |
| Pocket corners tear | Too little reinforcement | Add a backstitched triangle or bar tack at the top corners |
| Pocket feels bulky | Thick fabric and wide seam allowances | Trim and grade seam allowances, clip curves and use a lighter fabric for pocket bags |
| Pocket bag peeks out at the seam | The bag rolls to the outside | Understitch the pocket bag and press well |
| Rounded corners look lumpy | You didn’t ease in the fabric | Sew a basting line around the curve, pull it to gather slightly, then press over a template |
| Welt corners pucker or fray | Clipped too short or too far | Clip right up to the stitching without cutting it, and interface the area first |
Pocket sewing FAQ
What is the easiest of all the types of pockets in sewing?
The patch pocket. You sew it on top of the garment, so you can see exactly what you’re doing. Most beginners sew their first one in under 30 minutes.
How do I add pockets to a dress or skirt that doesn’t have them?
Add in-seam pockets to the side seams. Trace a pocket bag shape about the size of your hand, add seam allowance, and sew it in before you sew the side seams together.
What’s the difference between a slant pocket and a slash pocket?
They’re the same idea. Both have an angled opening on the front of pants or a skirt, with a pocket bag hidden behind it. “Slant” usually means a straight angle, and “scoop” means a curved one.
What fabric should I use for pocket bags?
Use a lightweight woven cotton, like quilting cotton or pocketing fabric. It’s strong, smooth and adds less bulk than the main fabric.
Do I need interfacing for pockets?
Use interfacing for welt pockets, zipper pockets and flaps. Simple patch and in-seam pockets usually don’t need it unless your fabric is very soft or thin.
How do I keep two pockets level with each other?
Mark both pockets at the same time. Measure each one the same distance from the center front and from the shoulder or waist, then check with a ruler before you sew.
Ready to put these pockets to work?
Learning these types of pockets in sewing is one of the easiest ways to make your clothes feel finished and truly yours. Start with a patch pocket, add an in-seam pocket to your next dress or skirt, and work your way up to a welt pocket when you’re ready.
If you’re dreaming of a closet full of clothes you made yourself, start with our Sew Your Own Wardrobe. It walks you through planning and sewing the pieces you’ll actually wear.
Have a pocket question or want to share your finished project? Join us in the Let’s Learn To Sew Facebook group and watch step-by-step sewing tutorials on our YouTube channel.