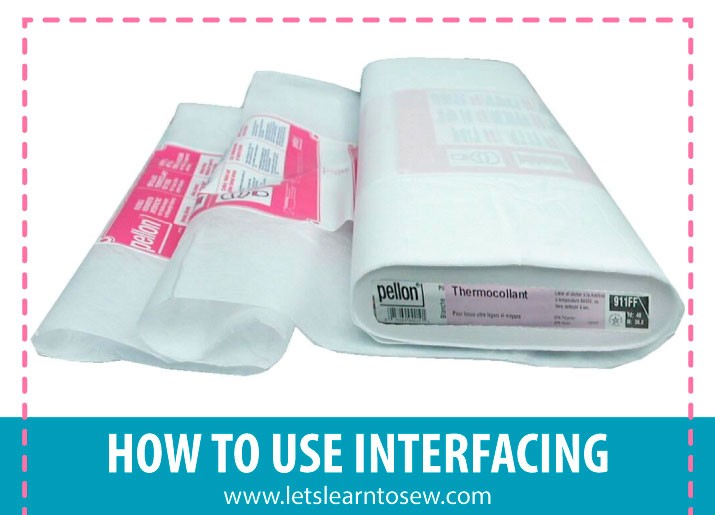
Many patterns call for interfacing when the fabric needs to be stabilized or strengthened. When shopping for interfacing you’ll find that there are lots of different types – iron-on or stitch-in; woven, non-woven, or knit; black or white; lightweight to heavyweight; in packages or by the yard. Which one you choose will depend on what fabric you’re using – the main thing to ensure is that the interfacing is a similar weight to the fabric so that it makes it just stiff enough. It is always better to go lighter rather than heavier.
When to use interfacing
Interfacing is used to add stiffness to fabric. On garments, patterns will typically call for interfacing in areas needing the extra body, like a shirt collar, or strength, like buttonholes. When sewing knit fabric, you may choose to use interfacing to keep the fabric from stretching out of shape. Accessories such as bags and purses will usually call for interfacing in the bottom of the bag to make it stiff on the bottom and on the sides so that it can maintain the shape of the bag.
The pattern will usually tell you what type of interfacing to buy and how much. On the pattern pieces, interfacing is shaded differently on the pattern instructions and is shown in the symbols key.
How To Choose Interfacing
The very first thing you must decide is what type to use.
Fusible: Convenient to use as there is a heat-activated adhesive on one side. Fusible interfacing is ironed to the wrong side of fashion fabric.
Sew In: Ideal for fabrics with textures or that can’t be ironed. Sew-in interfacing is sandwiched between layers of fabric and sewn into place.
Woven: Created from warp and weft fibers interwoven together. This type doesn’t have any stretch and will work well with any woven fabric.
Nonwoven: Resembles fleece or felt
Knit: Use a stretchy interfacing when using a knitted fabric, such as jersey, ribbed, double knit, etc.
The next factor is the weight of the interfacing. Interfacing comes in three weights: lightweight, medium weight, and heavyweight.
How to apply fusible interfacing
Step 1:
First lay your fabric right side down on your ironing board.
Step 2:
Lay the interfacing fusible side down on top of the fabric. The fusible side will have a bumpiness to it, while the non-fusible side will be smooth.
Step 3:
Lay a damp pressing cloth on top of the interfacing. Press the iron down for 15 seconds (10 for lightweight fabrics). If you need to move the iron to apply heat to another portion of the fabric, pick up the iron and set it down, don’t glide it. When you glide the iron, you run the risk of shifting the layers of fabric and interfacing, and you could end up with a mess on your ironing board cover.
Don’t skip the pressing cloth, you may end up with fusible interfacing stuck to your iron plate if you do. Always double check that your pressing cloth is covering the entire piece of fabric and interfacing.


hi, would like to make a denim brim up/brim down cloche hat for the summer. would you use woven or sew in interfacing for the best molding of the brim?
I would use a mid weight sew in interfacing.
thanks. hat’s what i thought,judy
What type of facing should I use for making book covers?
I would use a mid weight one. I almost always use iron on for the application.