Are you ready to start sewing buttonholes? Buttonholes can seem daunting to a beginner sewist, but I promise you they are easy peasy. Once you know how to sew them on your sewing machine using a one-step buttonhole foot you’ll never fear them again!
I’m going to walk you through how to use the one-step automatic buttonhole foot in this post and offer some troubleshooting tips to help you have a stress-free button stitching experience. If you’re not sure whether your sewing machine sews one-step or four-step buttonholes, the manual that came with your machine will tell you.
Let’s learn to sew buttonholes!
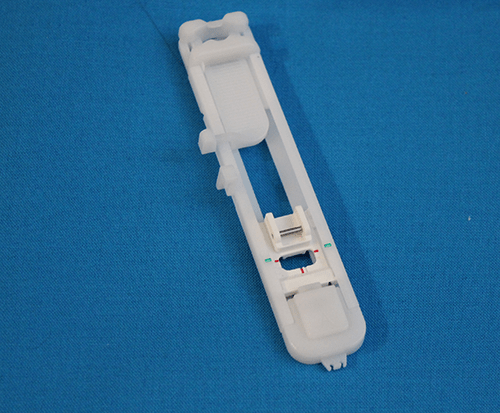
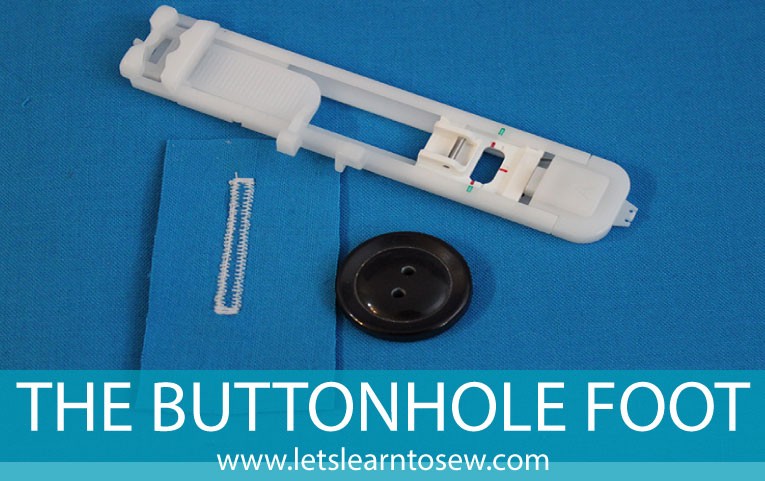
You machine should come with a buttonhole foot that looks something like the above foot.
1. Mark the buttonholes on your fabric according to the instructions.
2. Remove the foot that is currently on your machine.
3. Place one of the buttons you’re using for your project into the holder at the back of the buttonhole foot. Push the holder closed so it’s gripping the button tightly, making sure the button is lying flat. This will tell your machine how long to make each buttonhole.
4. Attach the buttonhole foot to your sewing machine, with the button towards the back.
5. Position the fabric underneath the foot so the needle is just above the bottom end of the buttonhole marking.
6. Pull the little lever to the left of the needle down as far as it will go.
7. Turn your machine on and select the automatic buttonhole stitch
8. Start sewing, and the machine will automatically sew all four sides of the buttonhole and stop stitching when it’s done. Once your machine comes to a stop, you can move on to the next buttonhole.
If you want really clean buttonholes, apply a small amount of Fray Check along the center strip of the buttonhole. Allow it to dry before opening the buttonhole.
Troubleshooting tips:
1. Check that the button is lying flat in the holder on the foot
2. Check that the lever to the left of the needle is pulled down all the way
3. Make sure you keep sewing until the end of each buttonhole sequence. You’ll know it is finished when the machine stops stitching by itself.
4. No matter how many times you’ve sewn buttonholes before, it’s always a good idea to test a sample on a scrap of interfaced fabric before attacking your real garment. Make sure you use a scrap of fabric from the project you are going to be working on.
Any questions? Did I miss anything? Let me know!


I have this kind of buttonhole maker on my Brother. It is incapable of making an eyelet hole. Is there any way to accomplish this?
Some machines have an eyelet hole stitch. If yours does not the only other way is by hand if you want a traditional thread covered eyelet. Depending on what the eyelet is for you can purchase metal or plastic eyelets and use eyelet pliers to insert them similar to the way snaps are inserted.