Basic Hand Stitches Every Sewist Should Know. I cringe inside ever so slightly as I type that because I try to avoid hand-sewing whenever possible. I even use my machine to sew on buttons! However, whenever I need to sew by hand, I'm thankful that I know the basic hand stitches.
Tools for Hand Sewing
Hand sewing requires very little besides a hand-sewing needle, thread, and the item that needs to be sewn. A thimble is handy for thicker fabrics but not necessary.
Hand Sewing Technique
Begin by treading a hand sewing needle with an 18-24" length of thread and knot the end. As you take a stitch, gently pull the thread; never tug or jerk. Pulling too tightly or hard will result in puckers, and if your thread is very long, you may find yourself with a knotted mess of thread. Secure the stitches with a knot on the wrong side of the fabric.
The Essential Basic Hand Stitches
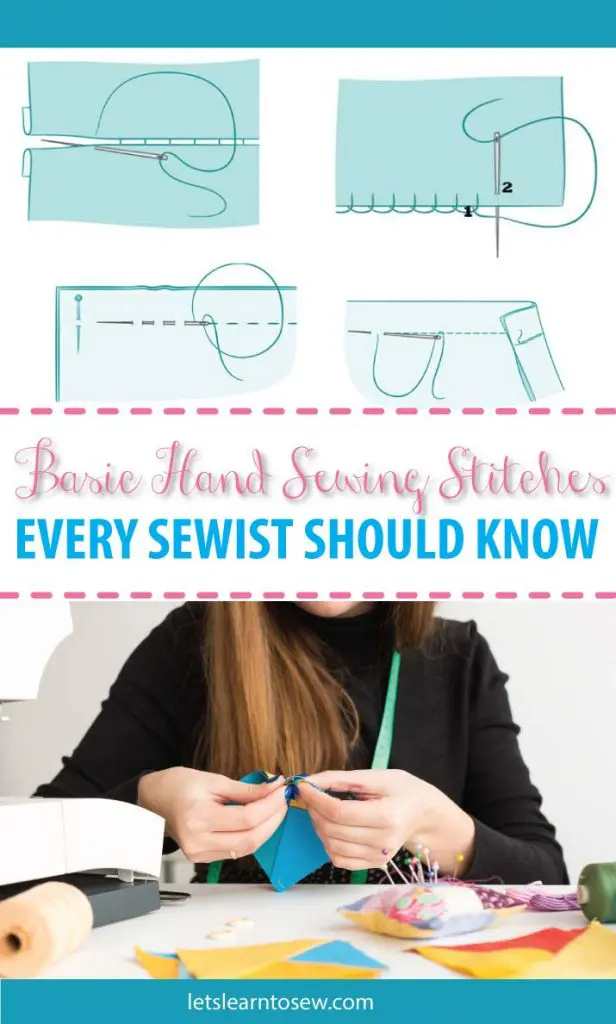
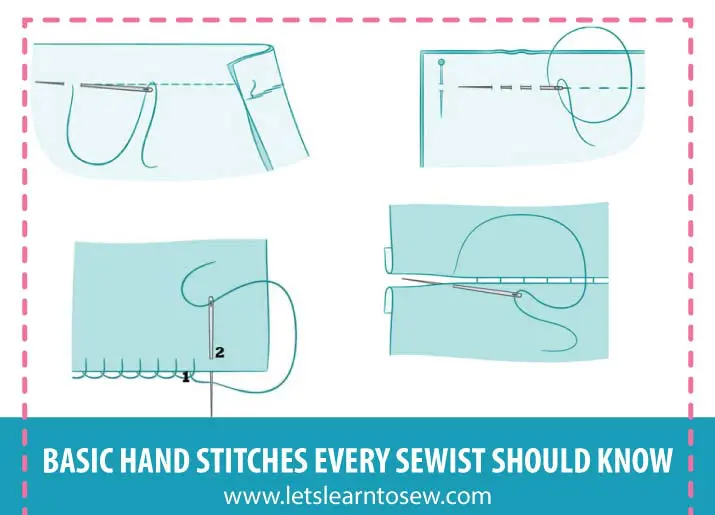
First, let's cover the three essential hand stitches. These three stitches will cover just about any basic sewing task you need to get done. The three essential stitches are the running stitch, backstitch, and slipstitch.
Running stitch
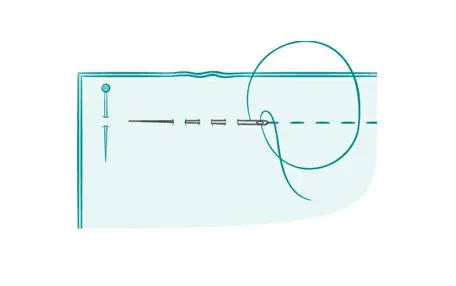
The running stitch is a simple straight stitch often used to baste. Basting is to sew with long, loose stitches that will temporarily hold the fabric in place before you sew permanent stitches. I use a running stitch sometimes to gather if the fabric is delicate. When using this stitch to baste, do not tie a knot at the end of the thread.
Insert the needle at evenly spaced intervals into the fabric several times, then pull the needle and thread through. Repeat.
Backstitch
This strong stitch is usually used to make a permanent seam. With the right sides of the fabric together, bring the threaded needle through the two layers of fabric. Pass the needle back down through the fabric, about ⅛" (3mm) to the right; bring it back up at about the same distance to the left of where you started. Repeat.
Slipstitch
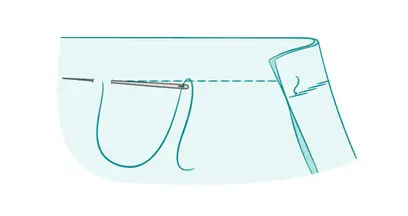
The slipstitch makes an invisible seam between folded edges or between one folded edge and one flat piece of fabric. The thread is hidden inside a fold of the fabric, making it virtually invisible.
Insert the needle through the fold and pass it through the top single layer of fabric; pick up a thread or two from the top of the opposite fold or flat piece of fabric. Pass the needle back into the fold, and repeat.
Less Common Hand Stitches
Now that I've covered the three essential hand stitches, I'll cover some less common ones that are handy to know. These include the ladder stitch and blanket stitch.
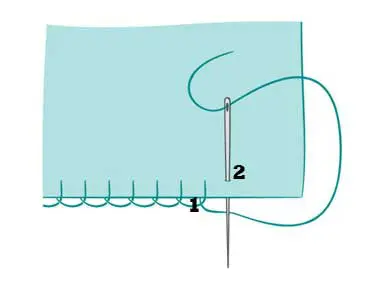
Blanket Stitch or Buttonhole Stitch
This is a common stitch for blanket edges. If using as a decorative edge, work so that the base of the U goes along the edge of the fabric. For lightweight fabric, stitch along the finished edge.
Insert the needle from the wrong to the right side, coming out at 1. Insert at 2. Where you come at again would be 3; hold the thread under the needle with your thumb and you pull tight.
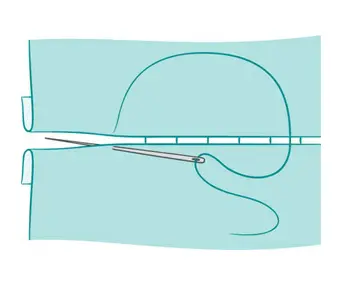
Ladder Stitch or Invisible Stitch
A ladder stitch is used to complete a project that requires an open seam for turning or stuffing. When the fabric is pulled apart, the stitches look like a ladder.
Start by inserting the needle inside the seam and bringing it to the outside; this will hide the knot in the seam allowance. Next, take a stitch on one side of the fabric parallel to the edge. Then, parallel to the edge, take a stitch on the other side of the fabric. Continue across the seam, forming a series of stitches that look like a ladder. Pull the thread tight to close the seam.
There you have it, the Basic Hand Stitches Every Sewist Should Know.

Katie
I am in awe of your sewing knowledge! It’s pretty awesome!