If you have ever had to iron a large piece of fabric, pattern pieces, or even a tablecloth on a regular ironing board, you know it can be frustrating. After a recent struggle with some large skirt pattern pieces, I found an alternative.
I have seen some large ironing board surfaces on quilting shows but have never seen one available for purchase, not even on Amazon! Being crafty, I decided to make one with a little help from my husband.
This board is a practical solution to working with large sections of fabric or patterns and is firmer and tauter than the standard board, making everything a little easier to press.
Knowing that the surface will eventually become discolored, I decided to make my cover easy to change. When the top layer of the board, which is made of utility fabric, becomes discolored from ironing, remove the staples, take it off, and replace it with a fresh piece.
This video will show you just how easy it is to create your oversized ironing board! I don’t promise that it will make you like ironing your patterns and larger pieces, but it will make it easier!
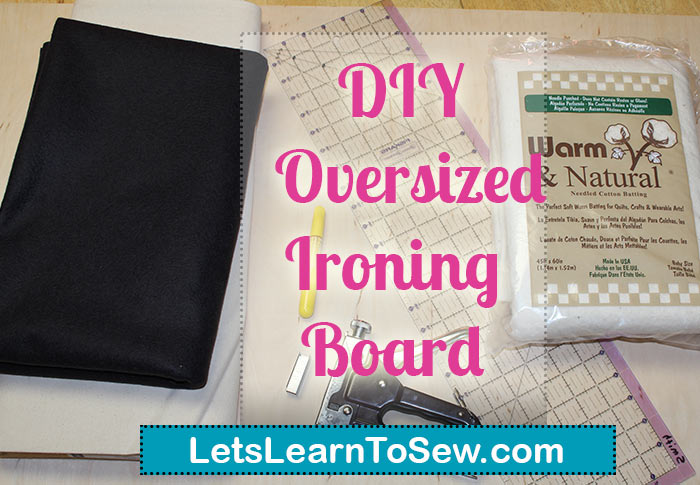
Supplies:
- Piece of 3/4-inch-thick high-grade plywood or 1/2″ premium wood Size depends on how big you want your board
- 2 pieces of cotton or wool felt at least 1 1/2″ larger than the board all the way around
- 1 piece Bump or Cotton Batting at least 2 1/2″ larger than the board all the way around
- 1 piece of medium-weight cotton twill or utility fabric must be 4″ larger than your board all the way around
- Stapler
- Marking pen or chalk
- Scissors
- Ruler
- Package of feet **optional**
Directions:
- Cover the plywood with two layers of felt. Wrap it around the back of the board and staple along the side, 1 1/2 inches from the edge. Cut the felt diagonally at the corners and bring the sides together to create a mitered corner.
- Cover the felt with a layer of Warm and natural Batting or Bump flannel. Along the sides, use the same stapling technique as for felt.
- Miter corners by pinching padding together at each corner so it’s centered diagonally, letting excess fabric stick up. Fold corners down neatly and staple.
- Iron muslin; wrap over the padding, and secure with staples, following the steps listed above. For a cleaner edge, fold the fabric’s edge under 1/2″ before stapling.
- With a rubber mallet hammer feet in place**** Feet are optional*****


Wow this is great! Thank you so much! I have always wanted an over-sized ironing board!
I’m wondering why the felt? Is the batting enough?
The felt helps with the moisture from the steam and prevent the board from warping.