Once you've reached the hemming stage, you're almost done! I know it can be tempting at this point to just finish as quick as you can, but remember beautiful creations can be ruined this way. Let's go ahead and cover what you need to know about the different types of hems in sewing.
What's a Hem
A hem is the finished edge of fabric in a garment where the raw edge is folded under and neatened in some way or finished in some other way. Hems also help clothing hang properly.
Categories of Hems
First, let's break it down into the two main categories and then each type. Hems can be either featured hems or inconspicuous hems. each needs different types of treatment and works best in specific situations. You will also need to decide if you want to hand sew or machine sew. I almost always machine sew my hems. Actually, I machine sew just about anything I can, even buttons.
How Much Fabric to Leave for the Hem
Most patterns and tutorials will specify the hem. If you're the one deciding or playing with a new design allow more hem than you think you will need. You can always trim it off but if it's too short you're out of luck.
Turning Under the Hem
When turning hems, ensure that the outside edge is the same size as, or bigger than, the area into which the hem will be sewn. If the circumference is hem is larger, it can eased or tucked to fit. If it is smaller, the stitching will create ugly puckers on the right side of the garment and no amount of clever pressing will be able to conceal it.
Pressing the Hem
I'm a big fan of pressing and ironing in your projects. Hems are no different. Pressing a crease in the edge of the hem can help make sewing easier. However, on some fabrics, pressing over the uppermost edge of the hem will leave a ridge or of any edge-finishing treatment such as a serge edge or zig-zag stitch on the right side of the fabric. You'll want to avoid pressing the flat edge of the hem or slide a piece of card stock between the hem and the inside of the garment when you are pressing it. This is usually not an issue when you use the EZY hem because it works as that barrier.
Types of Hem
Before I get into types let me mention that as we apply these different types of hems to the garments we're making together I'll come back and update the description with a video. Many of these hems can be done with a specialty foot to make it easier. I'll do my best to show you with both a traditional all-purpose foot and with the specialty foot.
Righ-side-out Hems
When a fabric is interesting on both sides the hem might be turned over to the right side, or outside of the garment as a feature. To do this, the seam has to be clipped and turned at the point just inside the finished level of the hem.
Stiffened Hems
Horse-hair (an open-weave- nylon thread), fishing line, cord, or boning are often used to stiffen items such as dancewear, formal wear, bridal wear, and stage costumes. These trims can be used to create a featured edge, or provide support for a particular silhouette. Fluted edges are made by zig-zagging over fishing line or thin cord that has been fed through the hole in the center front of the cording foot on the sewing machine.
Featured Serging
If you have a serger decorative edges can be a lot of fun. They can also make hems quick and easy for certain fabrics. A rolled hem with decorative thread is one of my favorite hems on baby blankets. It also works nicely on the floor-length dresses and skirts that are made with light-weight fabrics like chiffon.
Blind Hem
A blind hem should be almost invisible from the right side of the garment, especially if you use matching thread. The blind hem can be sewn by hand or on the sewing machine. A blind hem foot makes sewing blind hems a breeze.
This is more commonly used on woven fabrics, but a stretch version can be found on most modern sewing machines.
- Set your machine to the blind hem stitch. It looks like a small zigzag that opens out into a larger stitch every so often.
- Fold up the hem as usual, then fold the hem back to the right side of the garment. This should leave a little bit of the hem showing past the folded-over garment.
- Run the stitch along the small bit of exposed hem to that the larger stitch hops over and just catches the garment.
- Fold the hem back into place and press.
It is best to do some test samples first to work out how wide to make the stitch before sewing the garment.
A blind hem can also be sewn on a serger but you'll have to be careful that the folded edge is correctly positioned and be sure to disengage the cutting blade.
Machine-rolled hem
Machine Sewn Folded Edge Hem
This is probably the simplest type of hem and the one used for more casual garments or where it won't matter if the stitching line shows. Most of the garments I make are casual so I don't mind that if someone got very close and examined my hem they would be able to see the stitching on the hemline.
- Fold the bottom edge of the skirt ½" to the inside and press. For some skirts, you may find ¼" works better.
- Fold the hem over another ½" and press again. If it makes it easier you can put a few pins in to hold it in place. I often use fusible webbing. This will hold the hem in place while you stitch.
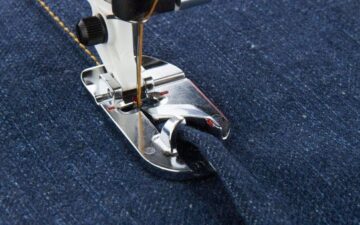
- Stitch as close to the top fold as you can. Some presser feet have guides to make this easier. If you don't have one you can use the outer edge of your all-purpose foot.
With a double-fold hem, the bobbin stitches show on the outside of the skirt. You will want to choose the bobbin thread accordingly.






Melissa Rabey
I'm not much of a sewer any more, but this was really useful! Thanks for all the great info.
Ellen Mika Zelasko
Thanks for the info. I've been frustrated because I would like to shorten longer shirts, but have struggled to know how to do it. Appreciate the info.
bexleah
Thank you so much for posting this! I always think I am a good sewer and then it turns out to be a disaster! I will definitely pull up this article the next time something has to be sewn.