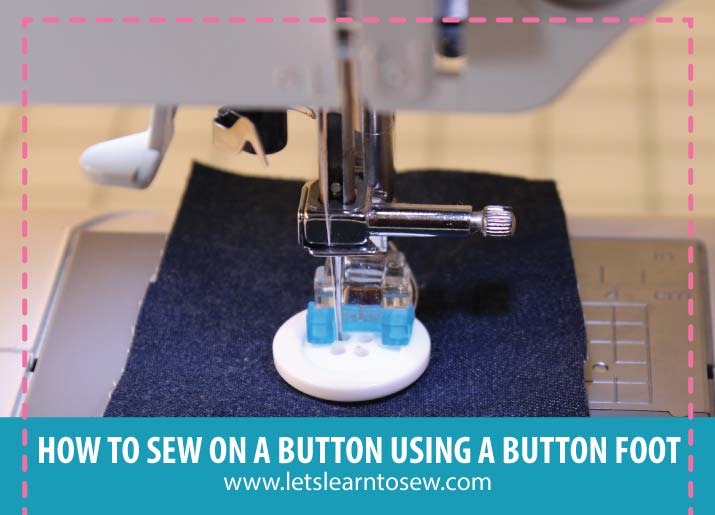
Sewing buttons on with your sewing machine can be a real time saver, whether it’s for mending ready-made garments or ones you’ve made yourself. The button foot can be used with two or four-hole buttons. If your machine does not come with this foot, you can purchase a universal button foot. Most universal button feet, like this one, are less than $10.00. If you prefer not to use a foot, I have a detailed post and video, How To Sew On A Button Without A Button Foot.
How To Use A Sewing Machine Button Foot
Begin by setting your machine up to sew on a button. The owner’s manual that came with your machine will have a detailed explanation of the process. I’ll list the steps that will apply to most sewing machines.
Setting up the machine
- Lower your feed dogs or place the cover over your feed dogs. This will prevent the feed dogs from moving and pulling the button to the back.
- Remove your universal foot and place the button foot on.
- Select your button stitch or zig-zag stitch. If your machine does not have a button stitch, set the stitch length to the shortest setting.
- Place the button under the foot aligning the holes between the space at the front of the foot.
- Turn the hand wheel slowly towards you.
- Ensure that the needle will go down into the button holes without hitting the button
- Adjust the stitch width as needed to ensure the needle goes down into the holes.
Sewing On The Button
- Place the fabric under the presser foot at the correct spot
- Place the button under the presser foot ensuring the holes are lined up between the opening of the foot.
- Turn the hand wheel towards you to ensure it is in the correct position.
- Slowly begin sewing
- After sewing for about ten seconds at low speed, press the reverse/backstitch button. This will Tie off the stitches
- Raise your presser foot and pull the fabric towards the back of the machine. Leave about a 4-5″ thread tail
Once you’re finished sewing on all of the buttons, make sure you raise your feed dogs.
Secure The Threads and Button
Finally, you will need to ensure the stitches are secured. You should see a thread tail at the top and the bottom. Turn the project over to the backside. If you look down at the base of the bobbin thread tail, you will see a loop. Use a pin or stylus to pull on the loop. Tie the two threads in a knot.
Once you get the hang of using the foot, you’ll find it easy to sew on buttons quickly. If you have any questions, let me know in the comments section. How do you currently sew on buttons? If by hand, have you tried using your sewing machine?


I have never done this before..your instructions seem to make it easy!
This looks so quick and efficient. I have sewn for years, but have never tried sewing a button on with my machine. Great post.
My sewing machine is a very basic Brother (not sure which model) and only does a few variations on zigzag and straight stitches. Will this be enough for the series? How do I do a satin stitch with this machine?
Yes, it will be enough for this series.