
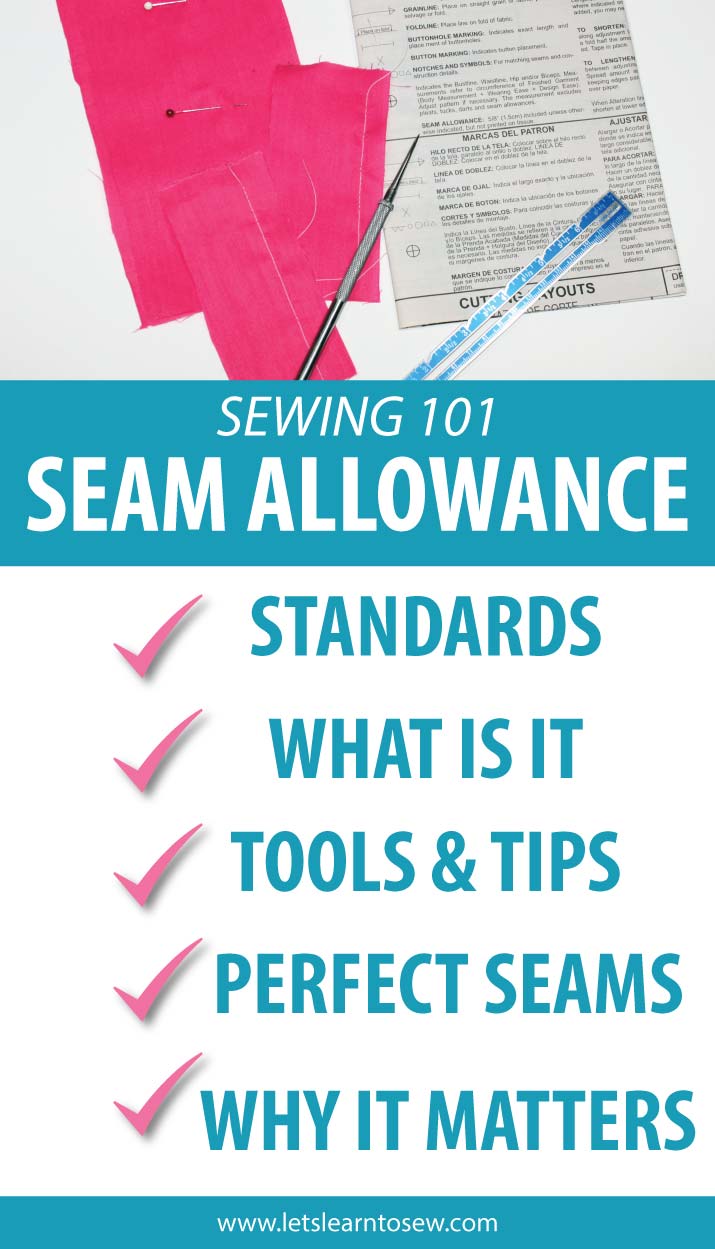
What is Seam Allowance?
Seam allowance is the area between the edge of the fabric and the stitching line on two (or more) pieces of material being stitched together. If you look at the inside of most ready-wear clothing you buy you won’t really be able to see it because the seams are usually sergerd. The raw edge, which is the outermost part of a seam allowance is bound within the segered seam.
Why Does The Seam Allowance Matter
The easiest way to think about is the fact that the seam allowance helps give the garment the proper fit. It’s the amount of room the pattern designer as added in to give you room to sew the fabric together. For every seam you sew, a seam allowance must be included. If you are off on the seam allowance your finished garment or project will not be sized correctly. All sewing patterns and tutorials should list the seam allowance you need to use.
Is There A Standard Seam Allowance?
That depends on what kind of project that you are sewing. A 5/8″ (1.5cm) seam allowance is generally considered a standard. the 5/8″ provides enough extra between the seam line and the cut edge of the fabric to ensure that the layers are all stitched when joining. It’s also important for fabrics that unravel easily. A 5/8″ (1.5cm) seam allowance is also easier to work with when pressing a seam open or topstitching. Finally, it also provides a small amount of adjustment space if a garment needs to be let out just a bit for a looser fit.
Standards:
- On most sewing patterns, the standard is 5/8″
- quilts are usually 1/4″. To get an accurate 1/4″ seam allowance a 1/4″ piecing foot is recommended
How To Get The Perfect seam allowance
There are many ways to ensure you sew the fabric together accurately. My favorite one, especially for beginners, is the magnetic seam guide. When you need to mark and off measurement you I find it useful to mark my own custom seam allowance.
Sometimes a pattern will require you to add in the seam allowance. In those instances, you’ll want to measure and mark the seam allowance. An adjustable seam gauge is tremendously useful if you need to mark a regular seam allowance around shaped pieces. For straighter pieces, especially larger ones, I like to use my Dritz Ezy Hem.
A Few Seam Allowance Tips
- Read through a pattern instructions before starting any project, make note of the seam allowances.
- If you adjust the seam allowance in one place, it will also need to be adjusted in corresponding areas
- Use the lines on the throat plate of your sewing machine to ensure you are sewing the correct measurement. Use a guided foot or magnetic seam guide if needed.
Suggested Tools


i love how in depth this post is! seam allowance is so important thanks for sharing!
this is super helpful! thank you so much for sharing!
You are so knowledgeable in this topic! Every time I read your posts I’m just amazed at how in depth sewing is.