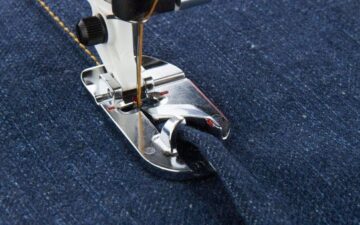
Neckbands can feel a little daunting but I'm going to show you how to prep and attach a knit neckband with ease. These steps will work with any scooped or rounded neckband for men or women's shirts in any size.
Prepping the Knit Neckband
With just a little prep work we can ensure that our neckband goes on with ease!
- Fold the neckband in half lengthwise with wrong sides together and press. If the edges curl, use a narrow strip of fusible web tape to fuse the layers together.
- With right sides together, stitch the narrow ends of the neckband together to form a circle.
- In order to apply the neckband evenly around the neck opening, divide both the neckband and the neck opening into quarters. Start by folding the binding in half with the seam at one end. Clip into the seam allowance with some snips. Make sure you don't go past the seam allowance at the opposite end of the fold. We only need a tiny snip.
- Refold the neckband, stacking the seam on top of the clip mark to find the quarter markings. Clip into the seam allowance at these two new end folds.
- To quarter-mark, the neck opening, pinch the shoulder seams together and clip into the seam allowance of the front and back at the folds.
- Then pinch into the front and back clips together and clip into the seam allowance to mar the end folds. These clips may not be located at the shoulder seams.
Attaching the Knit Neckband to the Neckline
- With the right sides together and raw edges aligned, match the clip marks on the binding with the clip marks on the neck opening. Make sure you start by putting the neckband seam at the center back clip. Pin together at each clip mark.
- Starting at the center back, line up the edge of the presser foot with the outer folded edge of the neckband. Move the needle position to the right distance you want for the finished neckband. With your right hand, hold the next quarter-marked pin and stretch the neckband. Stretch enough to match the neck opening. Be sure to keep all the raw edges together. Stitch from pin to pin using your left hand to control the alignment of the neckband to the neck edge.
- You can either trim the seam allowance close to the stitching and leave the raw edges or use a serger to clean them up or one of the stitches from our post on finishing raw edges.
- Finger-press the seam allowance toward the inside of the garment, which turns and exposes the front side of the neckband on the right side of the garment. Position the neckband under the sewing machine presser foot so that the needle is positioned just above the seam line. Then, move the needle to the left position and stitch next to the seam, catching the seam allowance on the wrong side.
- Once the neckband is completely sewn, place the neck opening over a tailor's ham. Apply steam to the neckband and hand press the neckband. This will help ensure a smooth flat curved shape. allow the neckband to dry before removing it from the ham.
Next, we need to insert the sleeves into our t-shirt and sew the side seams together. We are getting so close to finishing this shirt!


Leave a Reply